Create ticket types
A ticket type is one kind of pass, such as a Standard pass, a free Community pass or a one-day pass. Each has its own price, number of places and rules. Registration opens once your event has at least one ticket type and is published.
Open Tickets and packages
-
In the sidebar, under Event, select Tickets and packages.
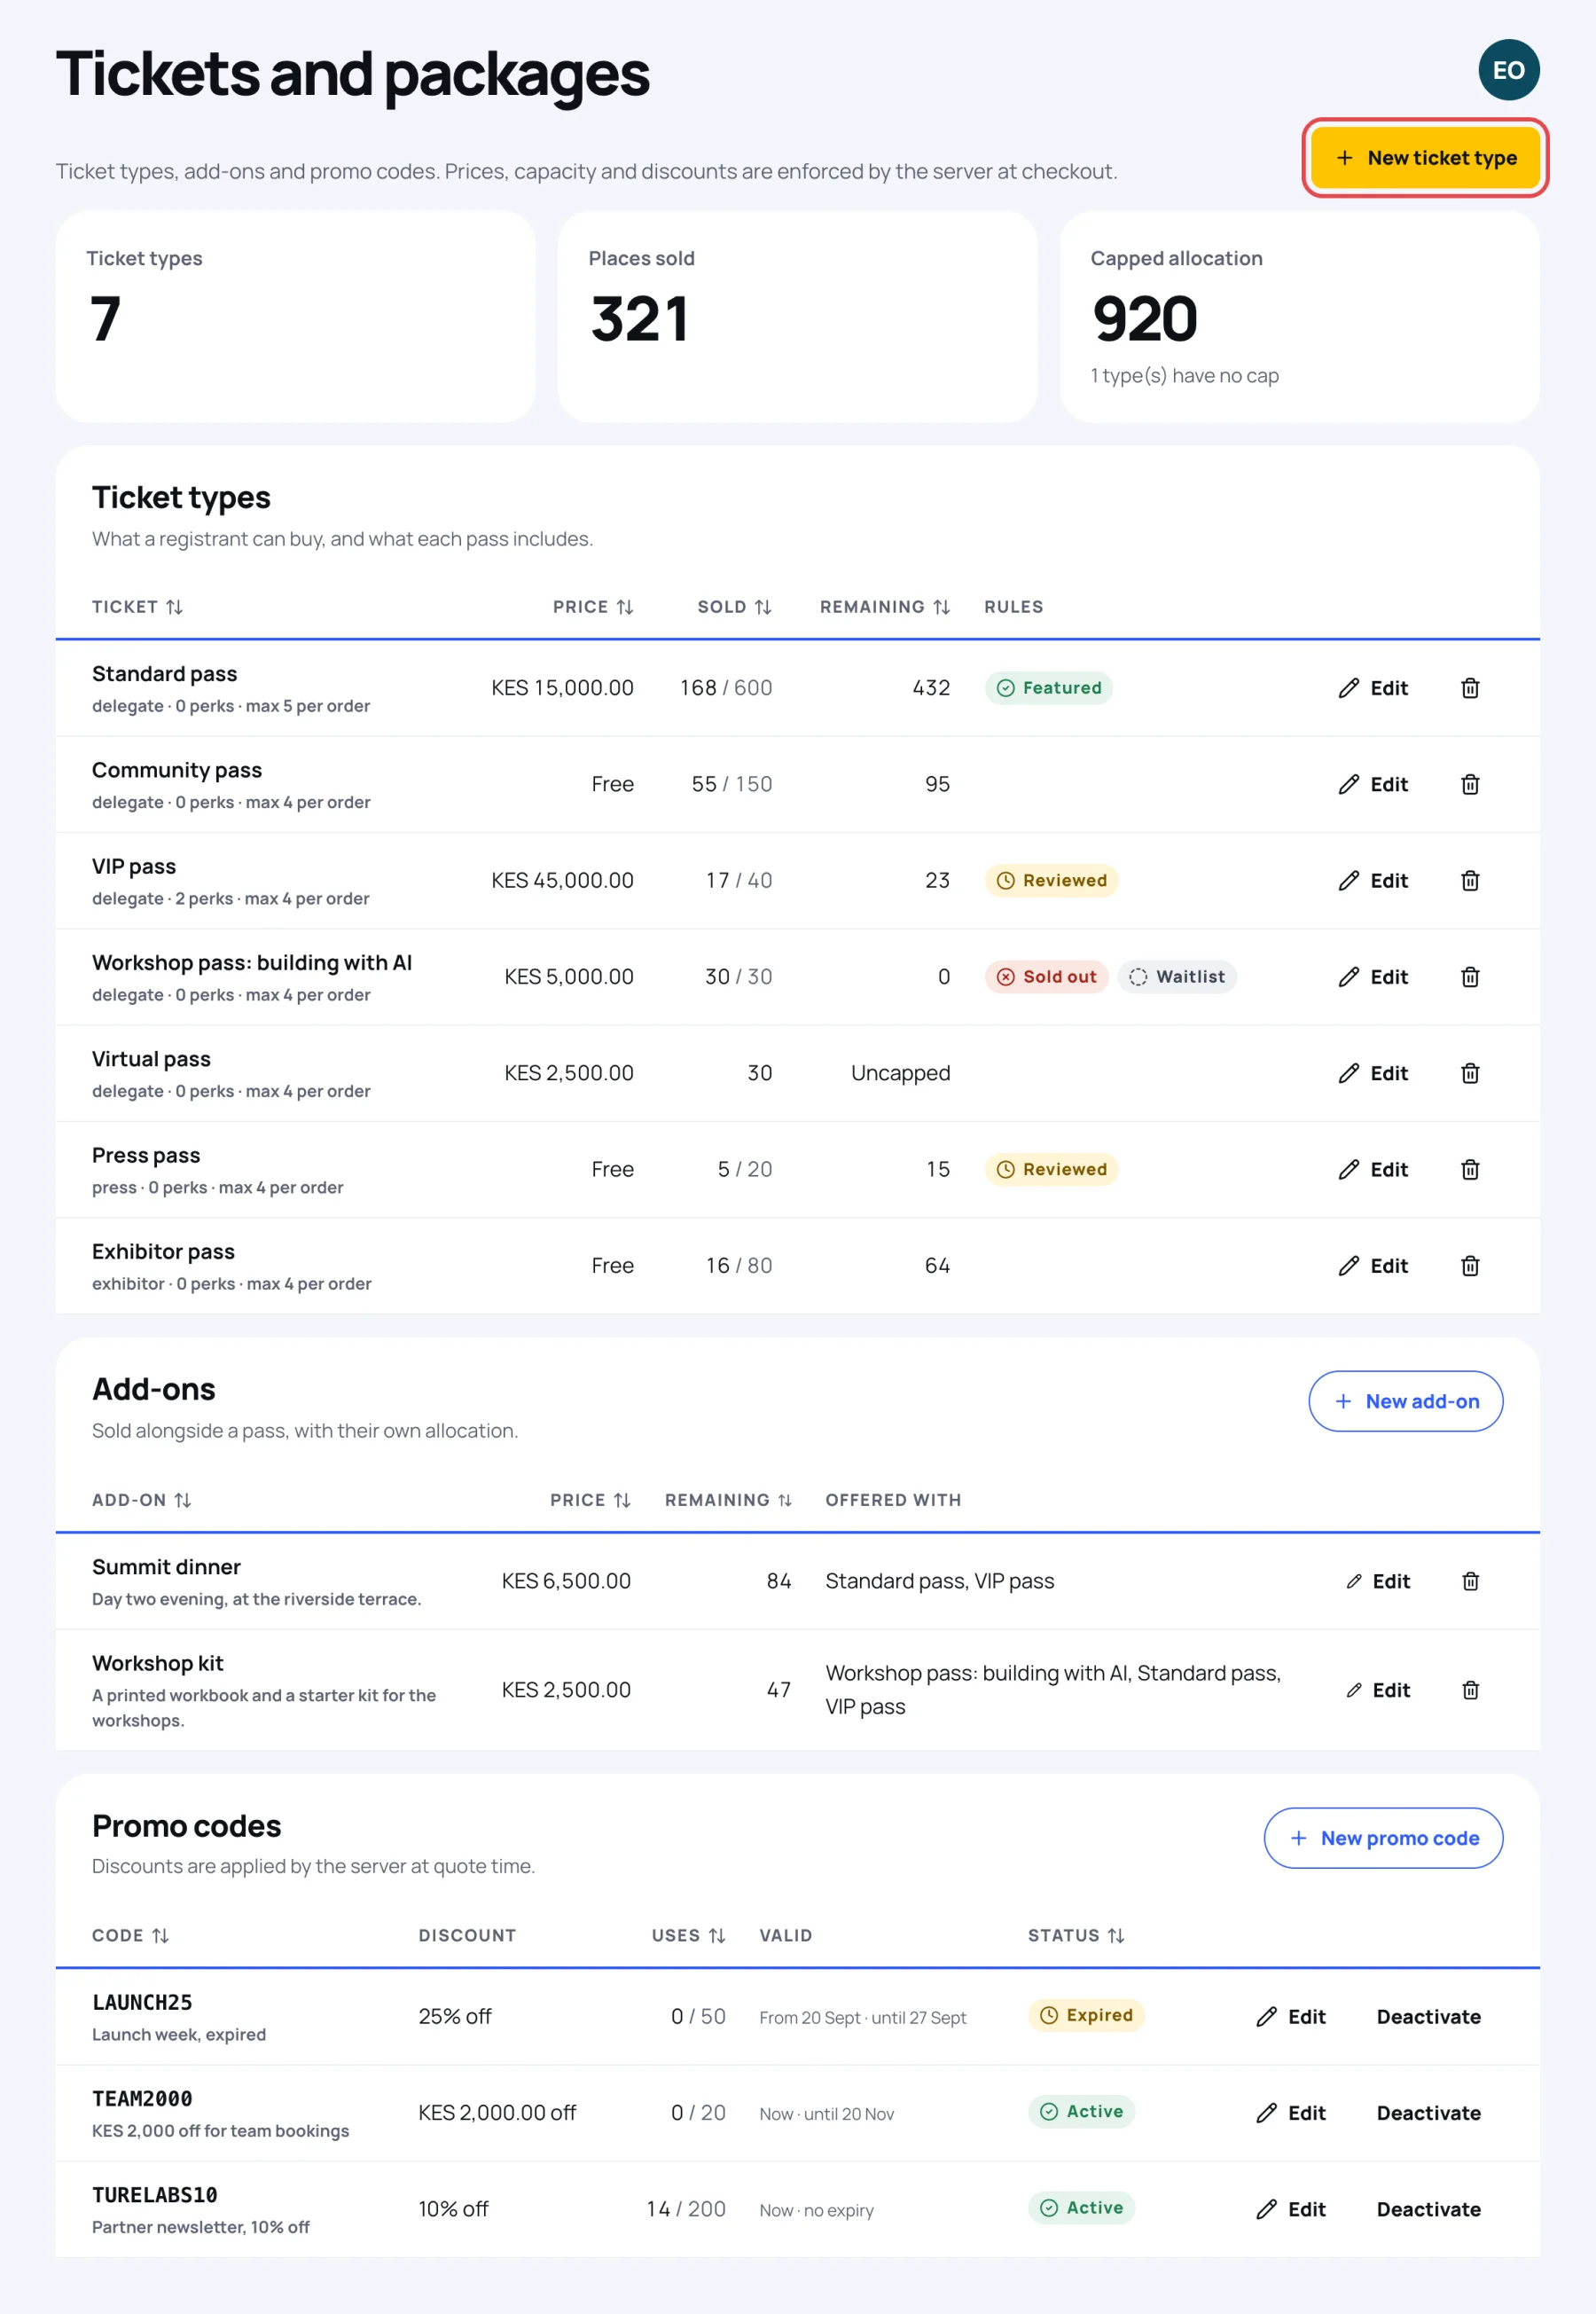
The page has three tables: Ticket types, Add-ons and Promo codes. The tiles at the top count your ticket types, the Places sold and the Capped allocation, with a note when some types have no cap.
-
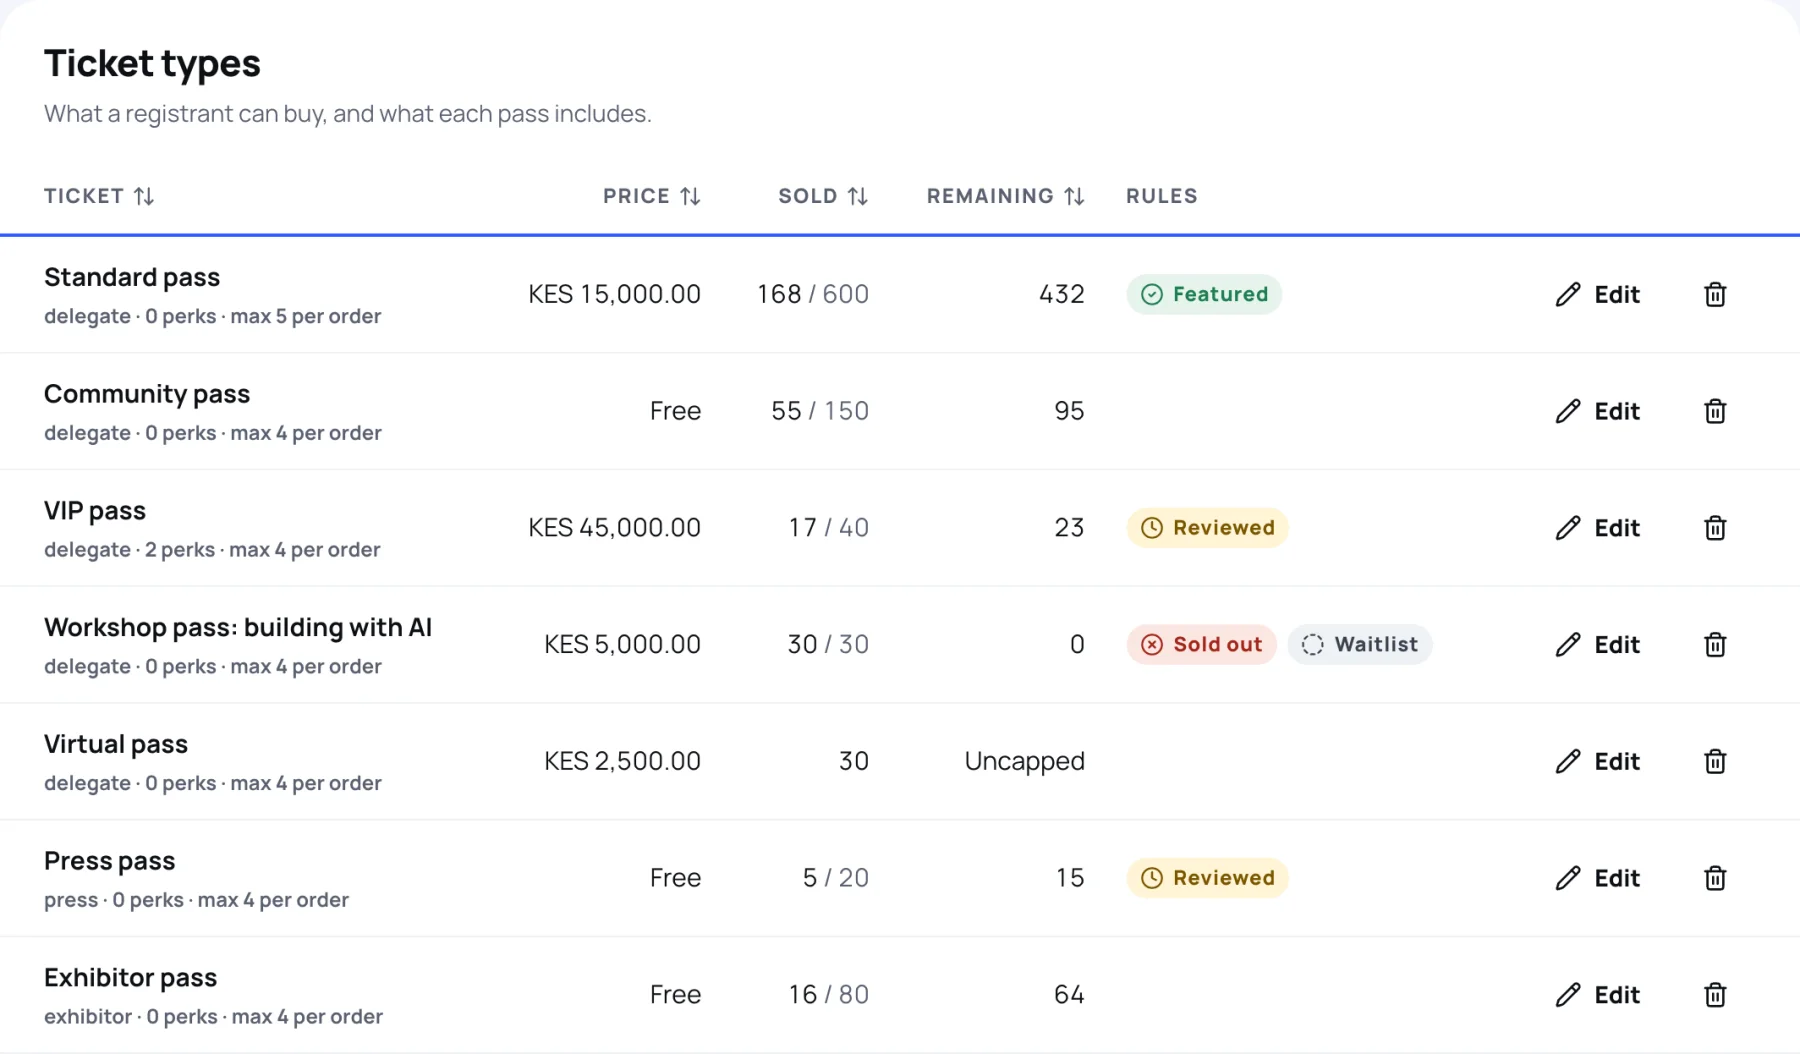
Read the Ticket types table. For each type you see its price, how many are Sold out of the allocation, how many are Remaining, and its Rules: Featured, Reviewed, Sold out, Waitlist or Valid on one day.
Add a ticket type
-
Select New ticket type.
-
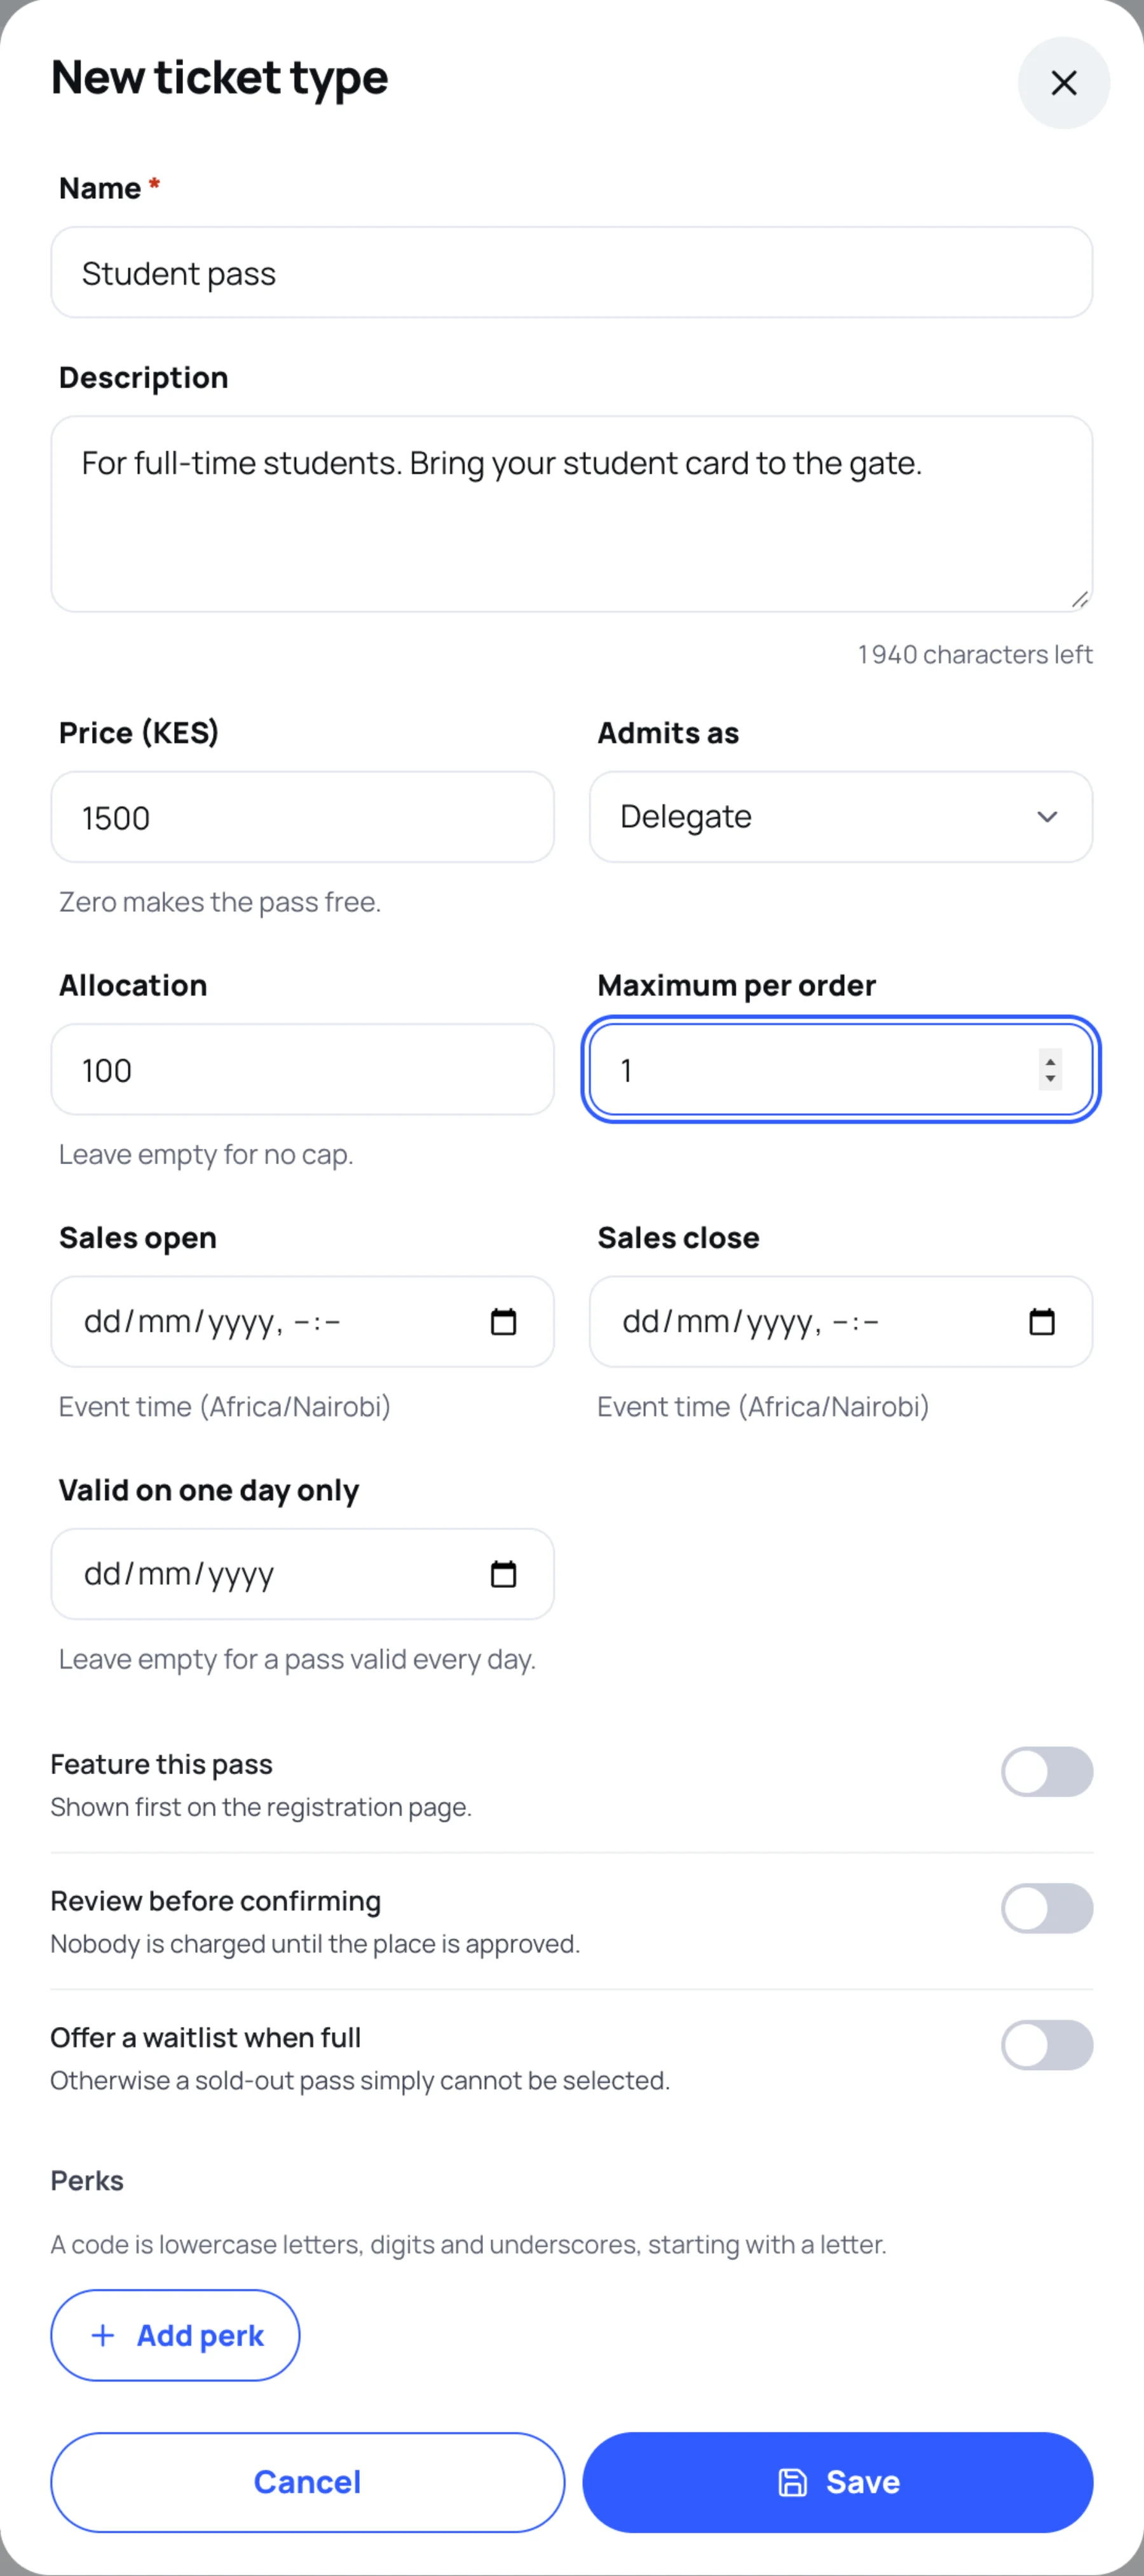
In Name, type what buyers will see, for example "Student pass".
-
In Description, say what the pass includes and anything the holder must bring. It shows under the name on the registration page.
-
In Price, type the price in the event's currency. 0 makes the pass free.
-
In Admits as, choose the kind of attendee the pass is for: Delegate, Speaker, Exhibitor, Sponsor or Press. This sets the colour band on the badge (see design your badges).
-
In Allocation, type how many places this pass has. Leave it empty for no cap.
-
In Maximum per order, type how many of this pass one person can buy in one order, for example 5 for team bookings.
-
Optional: set Sales open and Sales close. Times are in the event's time zone, which is shown under each field. Leave them empty to sell from now until the event.
-
Optional: set Valid on one day only to make a day pass. Leave it empty for a pass that is valid every day. At the gate, a day pass is refused on any other day (see what each scan result means).
-
Choose the switches you need:
- Feature this pass: shown first on the registration page, marked as the most popular.
- Review before confirming: your team approves each order first. See review orders and run a waitlist.
- Offer a waitlist when full: once the pass sells out, people can join a queue instead.
-
Select Save.
Add perks to a pass
Perks record what a pass includes beyond entry, such as a lounge or a meal.
-
Open the pass with Edit, then scroll to Perks.
-
Select Add perk.
-
Fill in a Code (lower case letters, digits and underscores, starting with a letter, for example
vip_lounge), a Label people will read, a Kind (Access, Meal, Merchandise or Session) and an Allowance. Leave Allowance as Any for no limit. -
Select Save.
Change or remove a ticket type
- To change a pass, select Edit on its row, make your changes and select Save. Orders already placed keep the price they were quoted.
- To remove a pass nobody has bought, select the bin on its row and confirm.
Check what buyers see
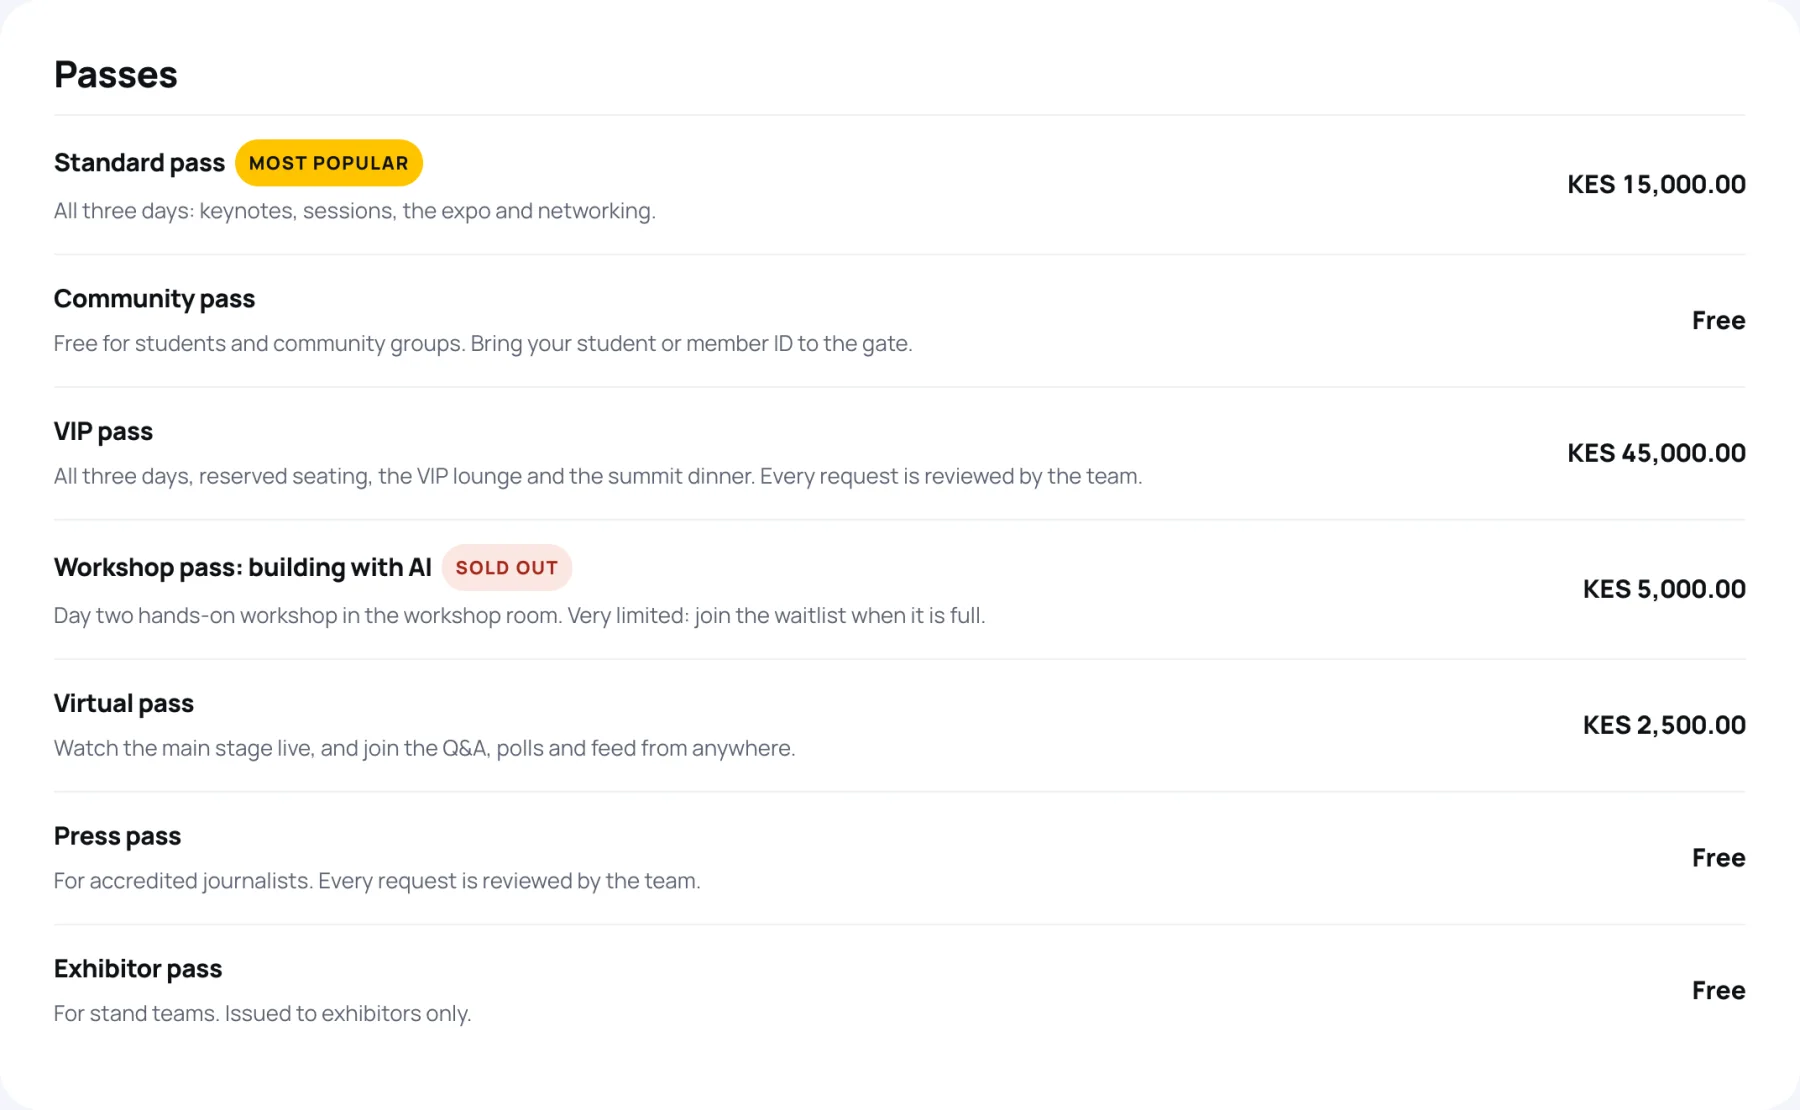
Open the registration page to see your passes as buyers do. In the sidebar, select Links and sharing, then Open next to the registration link. See links and sharing for every other link.

Last updated