Invite guests
Invite people by email to a free pass or to a paid place on a ticket you choose. Each person gets a personal link. They fill in the registration form and create their account (or sign in) from it.
See your invitations
-
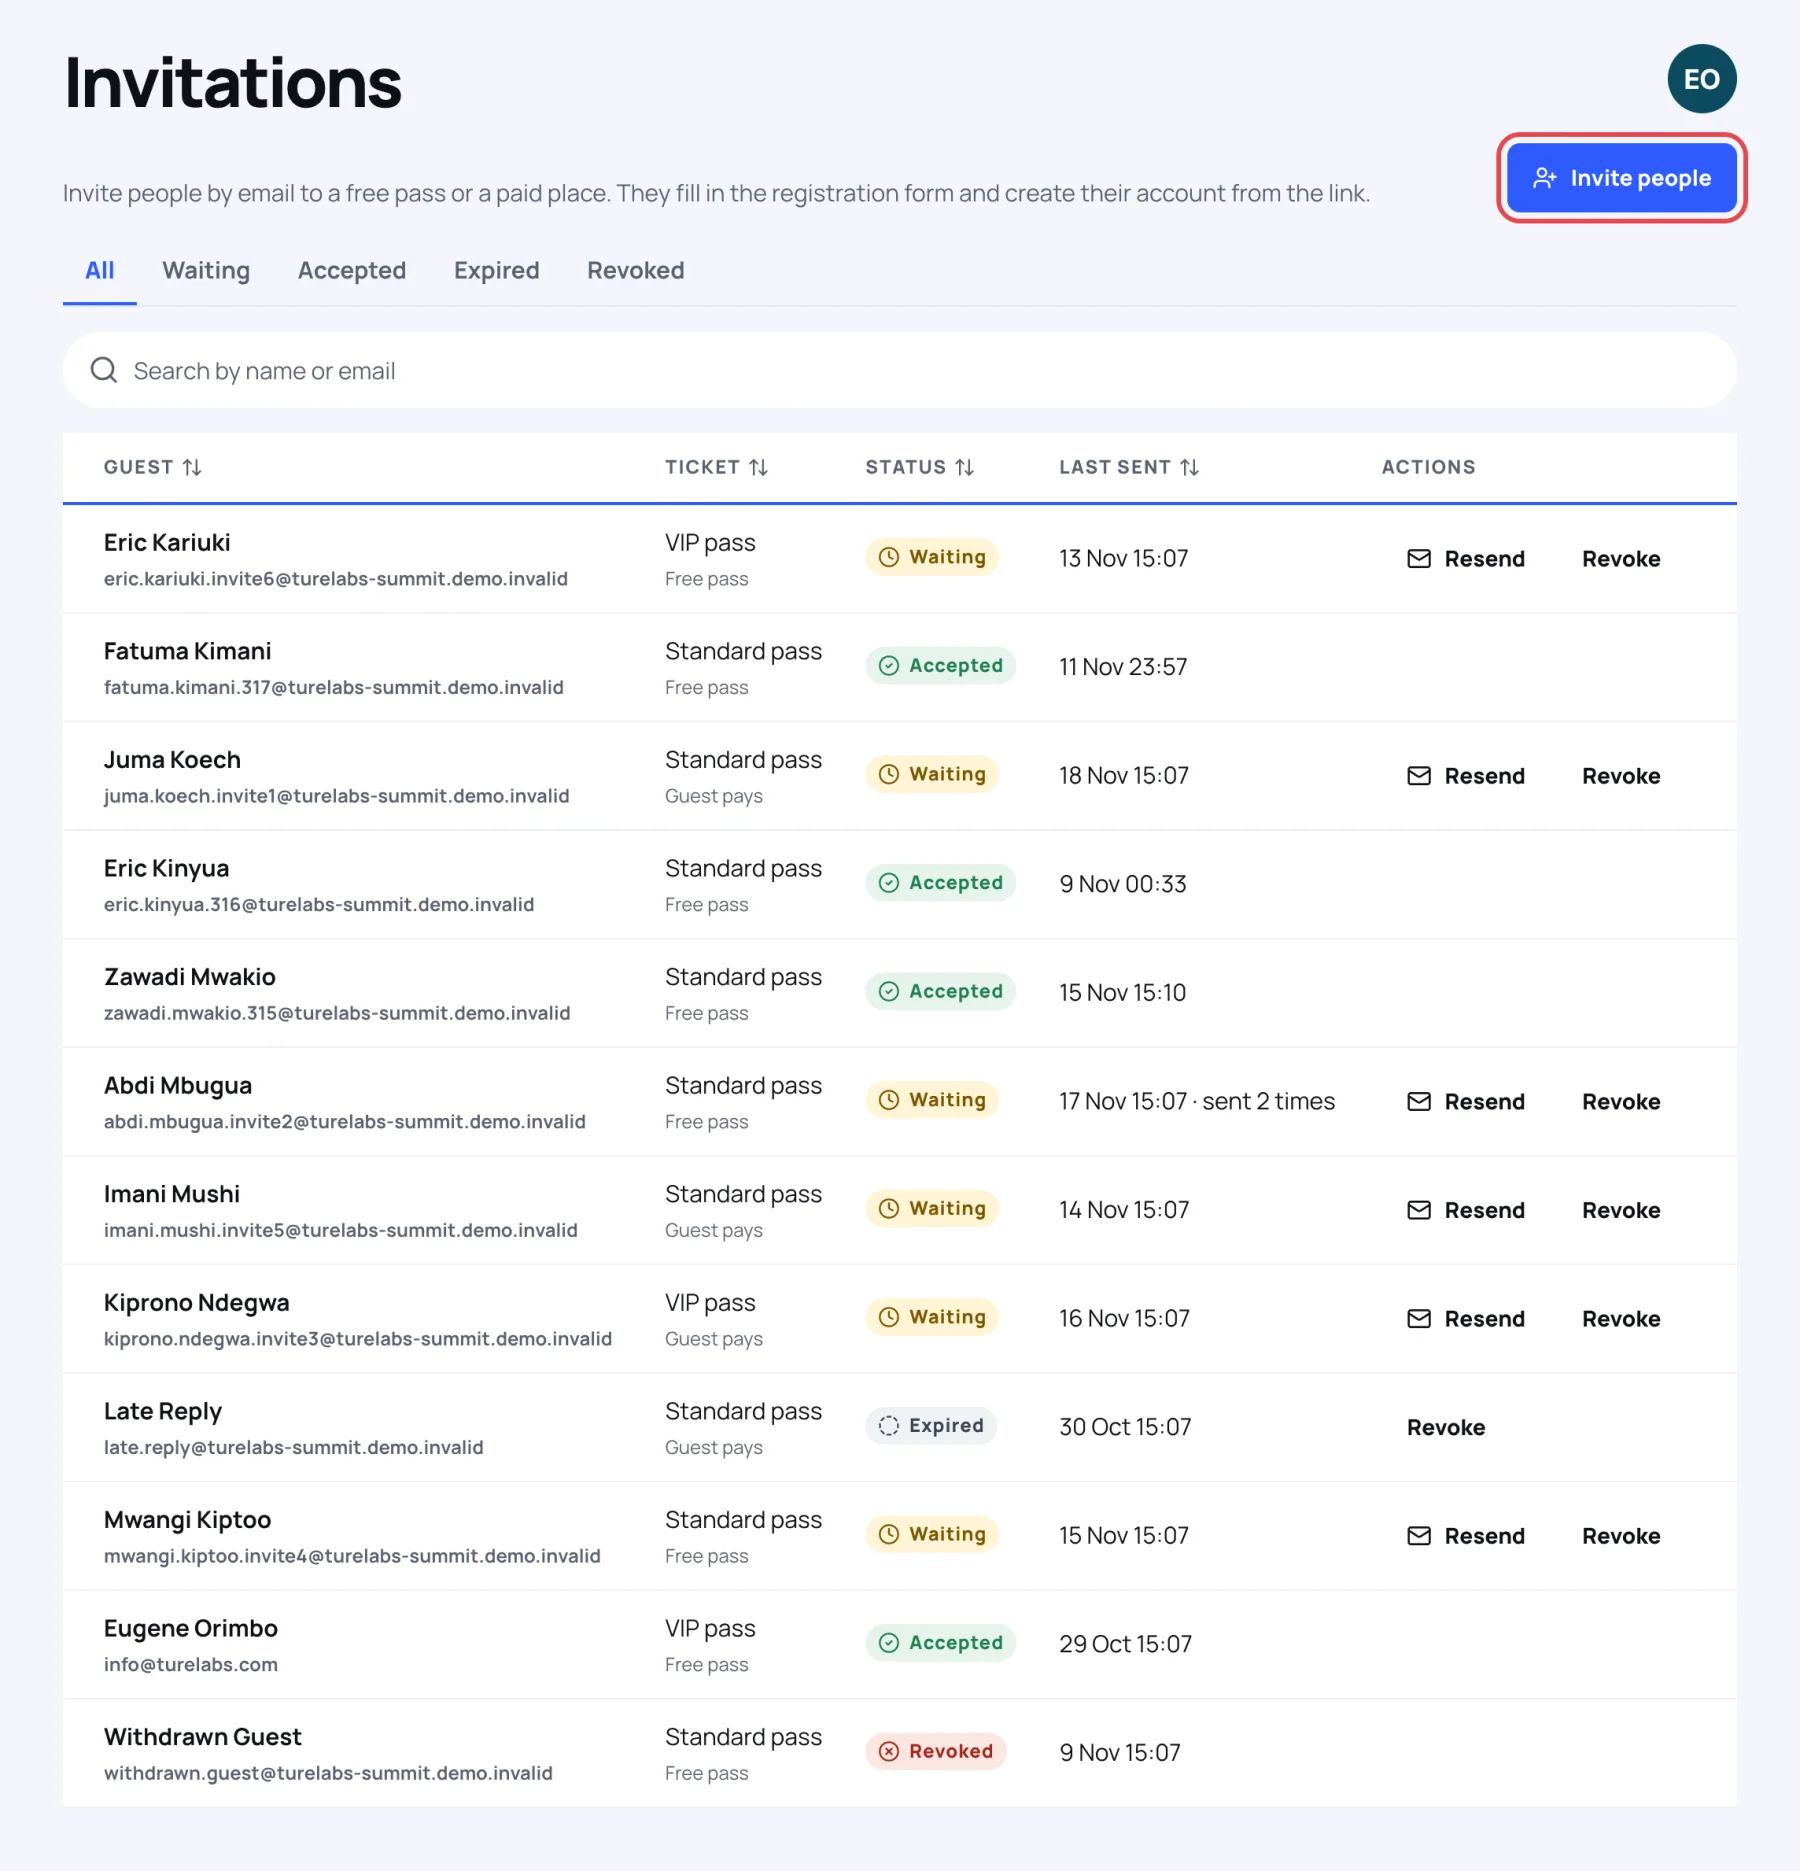
In the sidebar, under People, select Invitations.
Each row shows the guest, the Ticket with Free pass or Guest pays, the Status and when it was Last sent. Use the tabs to show Waiting, Accepted, Expired or Revoked invitations, or search by name or email.
Invite one person
-
Select Invite people.
-
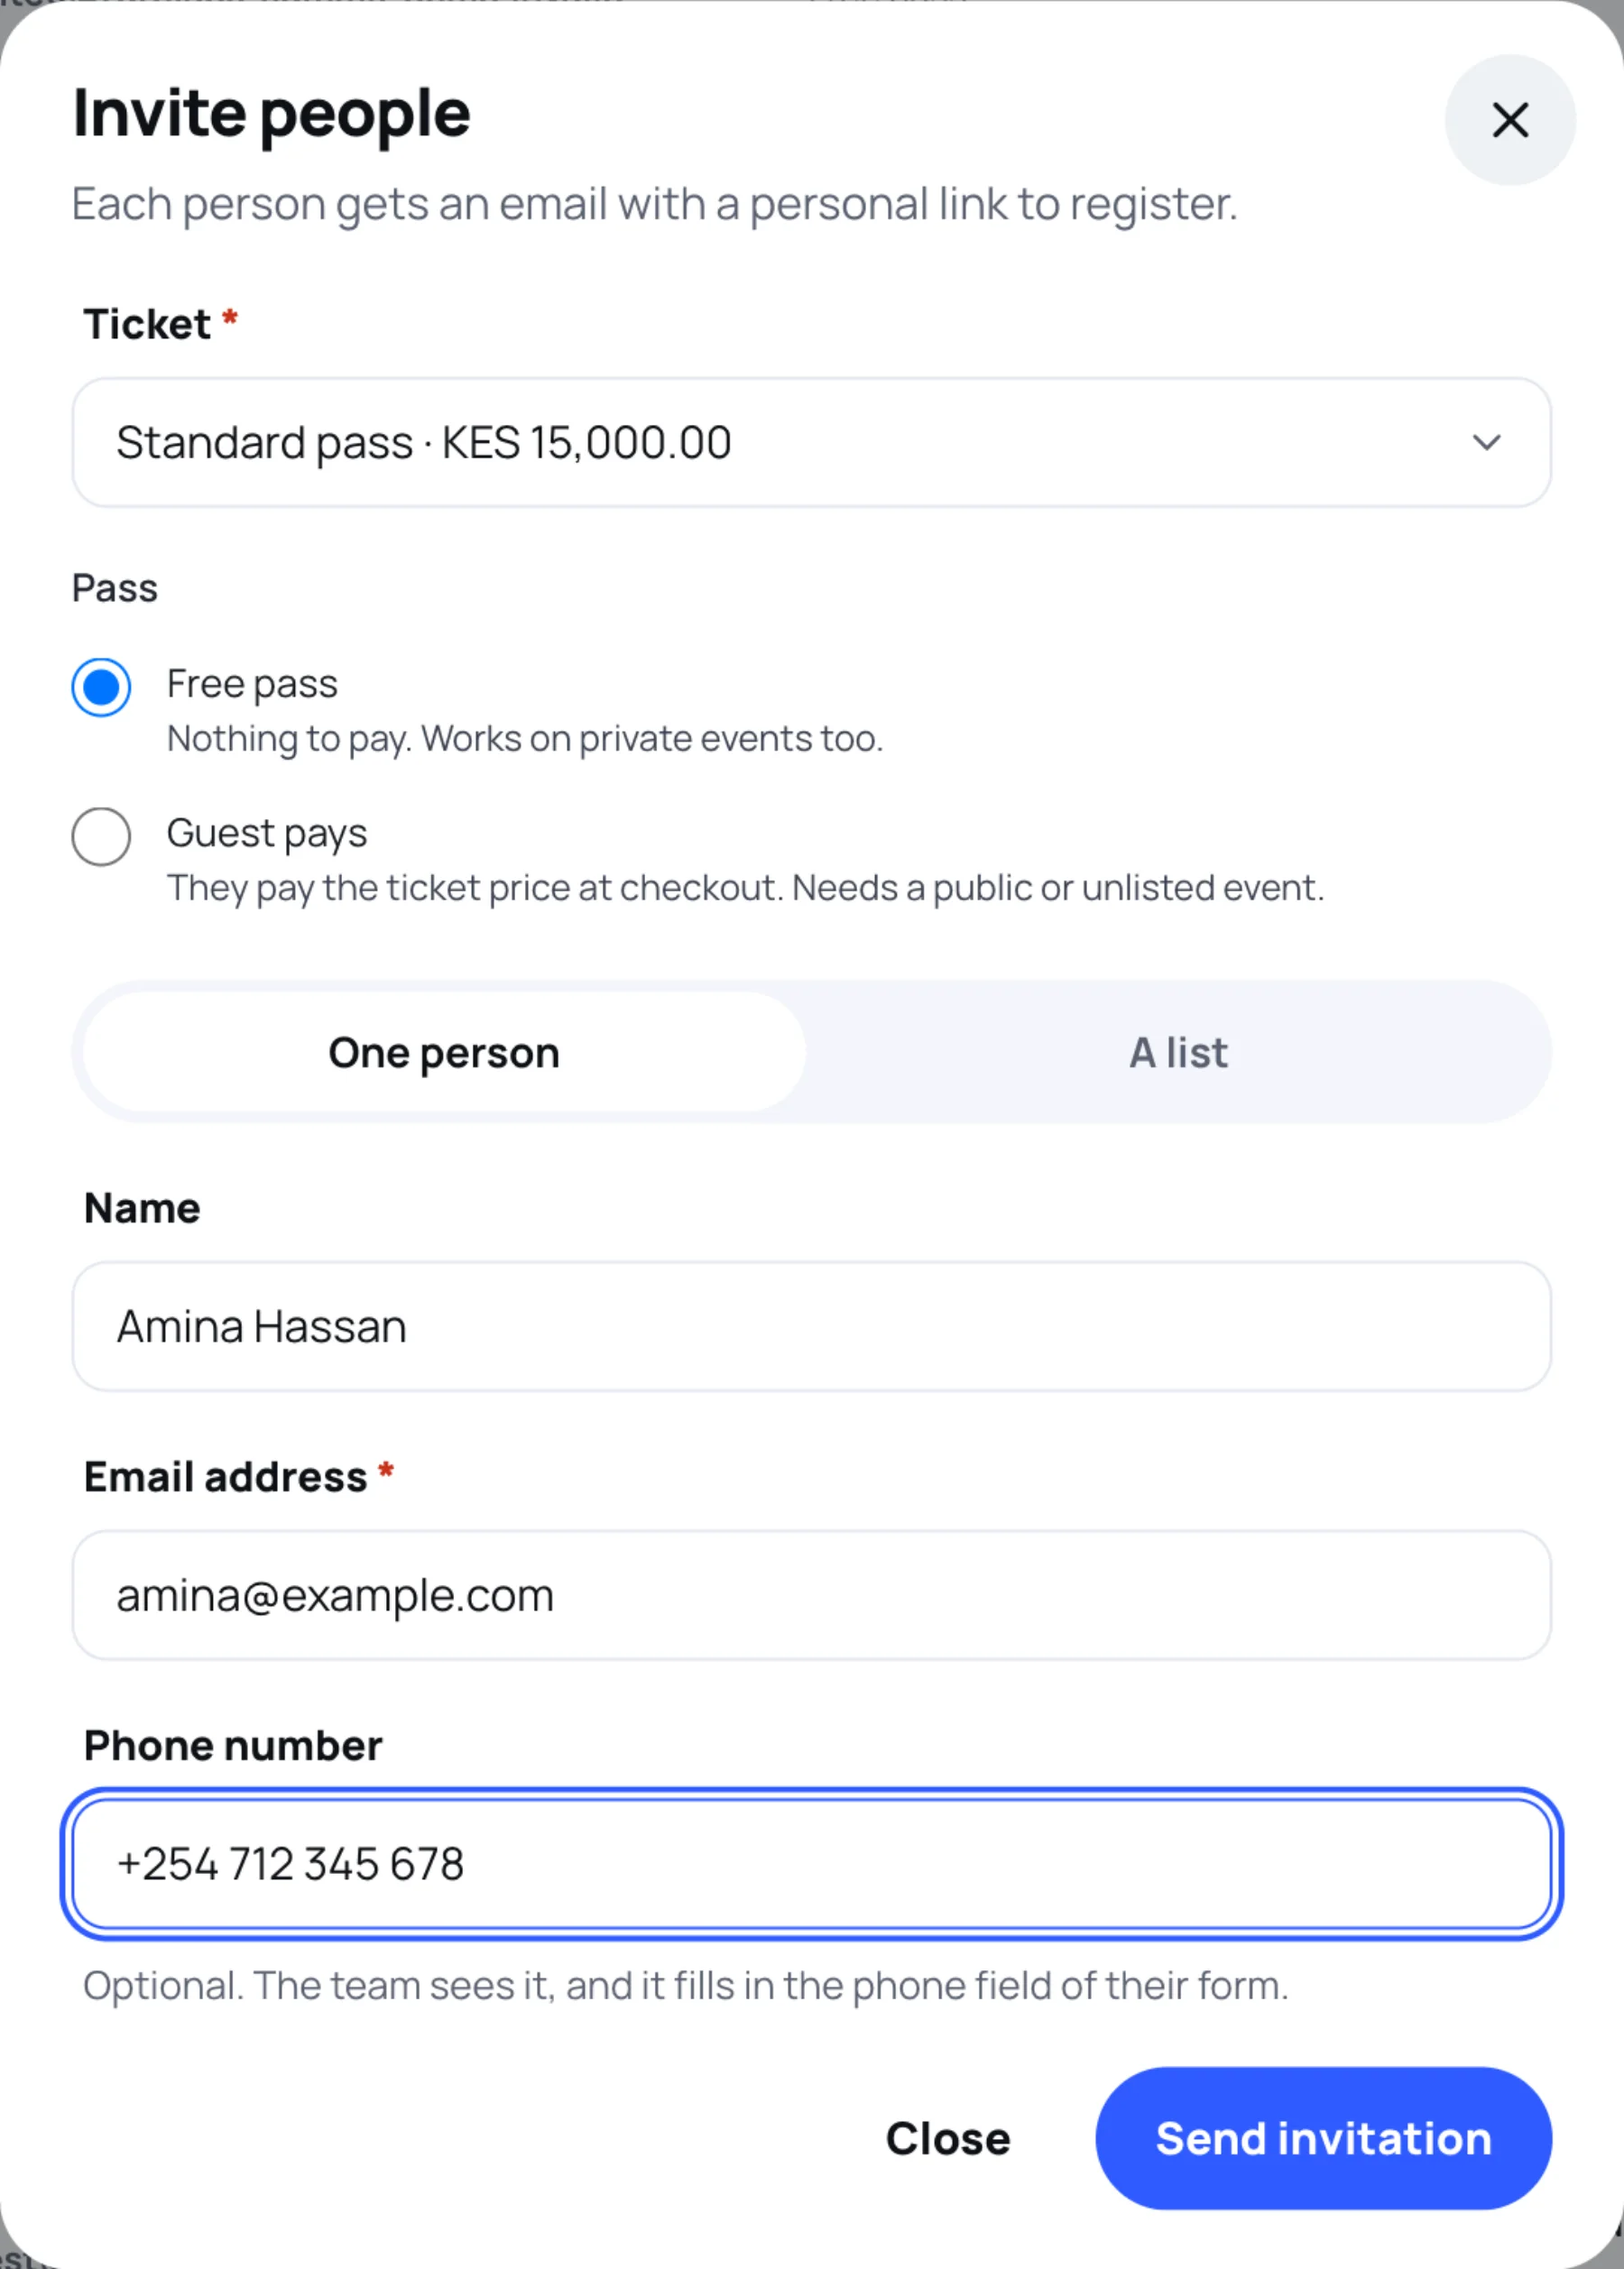
In Ticket, choose the pass.
-
Under Pass, choose:
- Free pass: nothing to pay. Works on private events too.
- Guest pays: they pay the ticket price at checkout. Needs a public or unlisted event.
-
Leave One person selected. Type their Name (optional), Email address and Phone number (optional).
-
Select Send invitation.
Invite a list
-
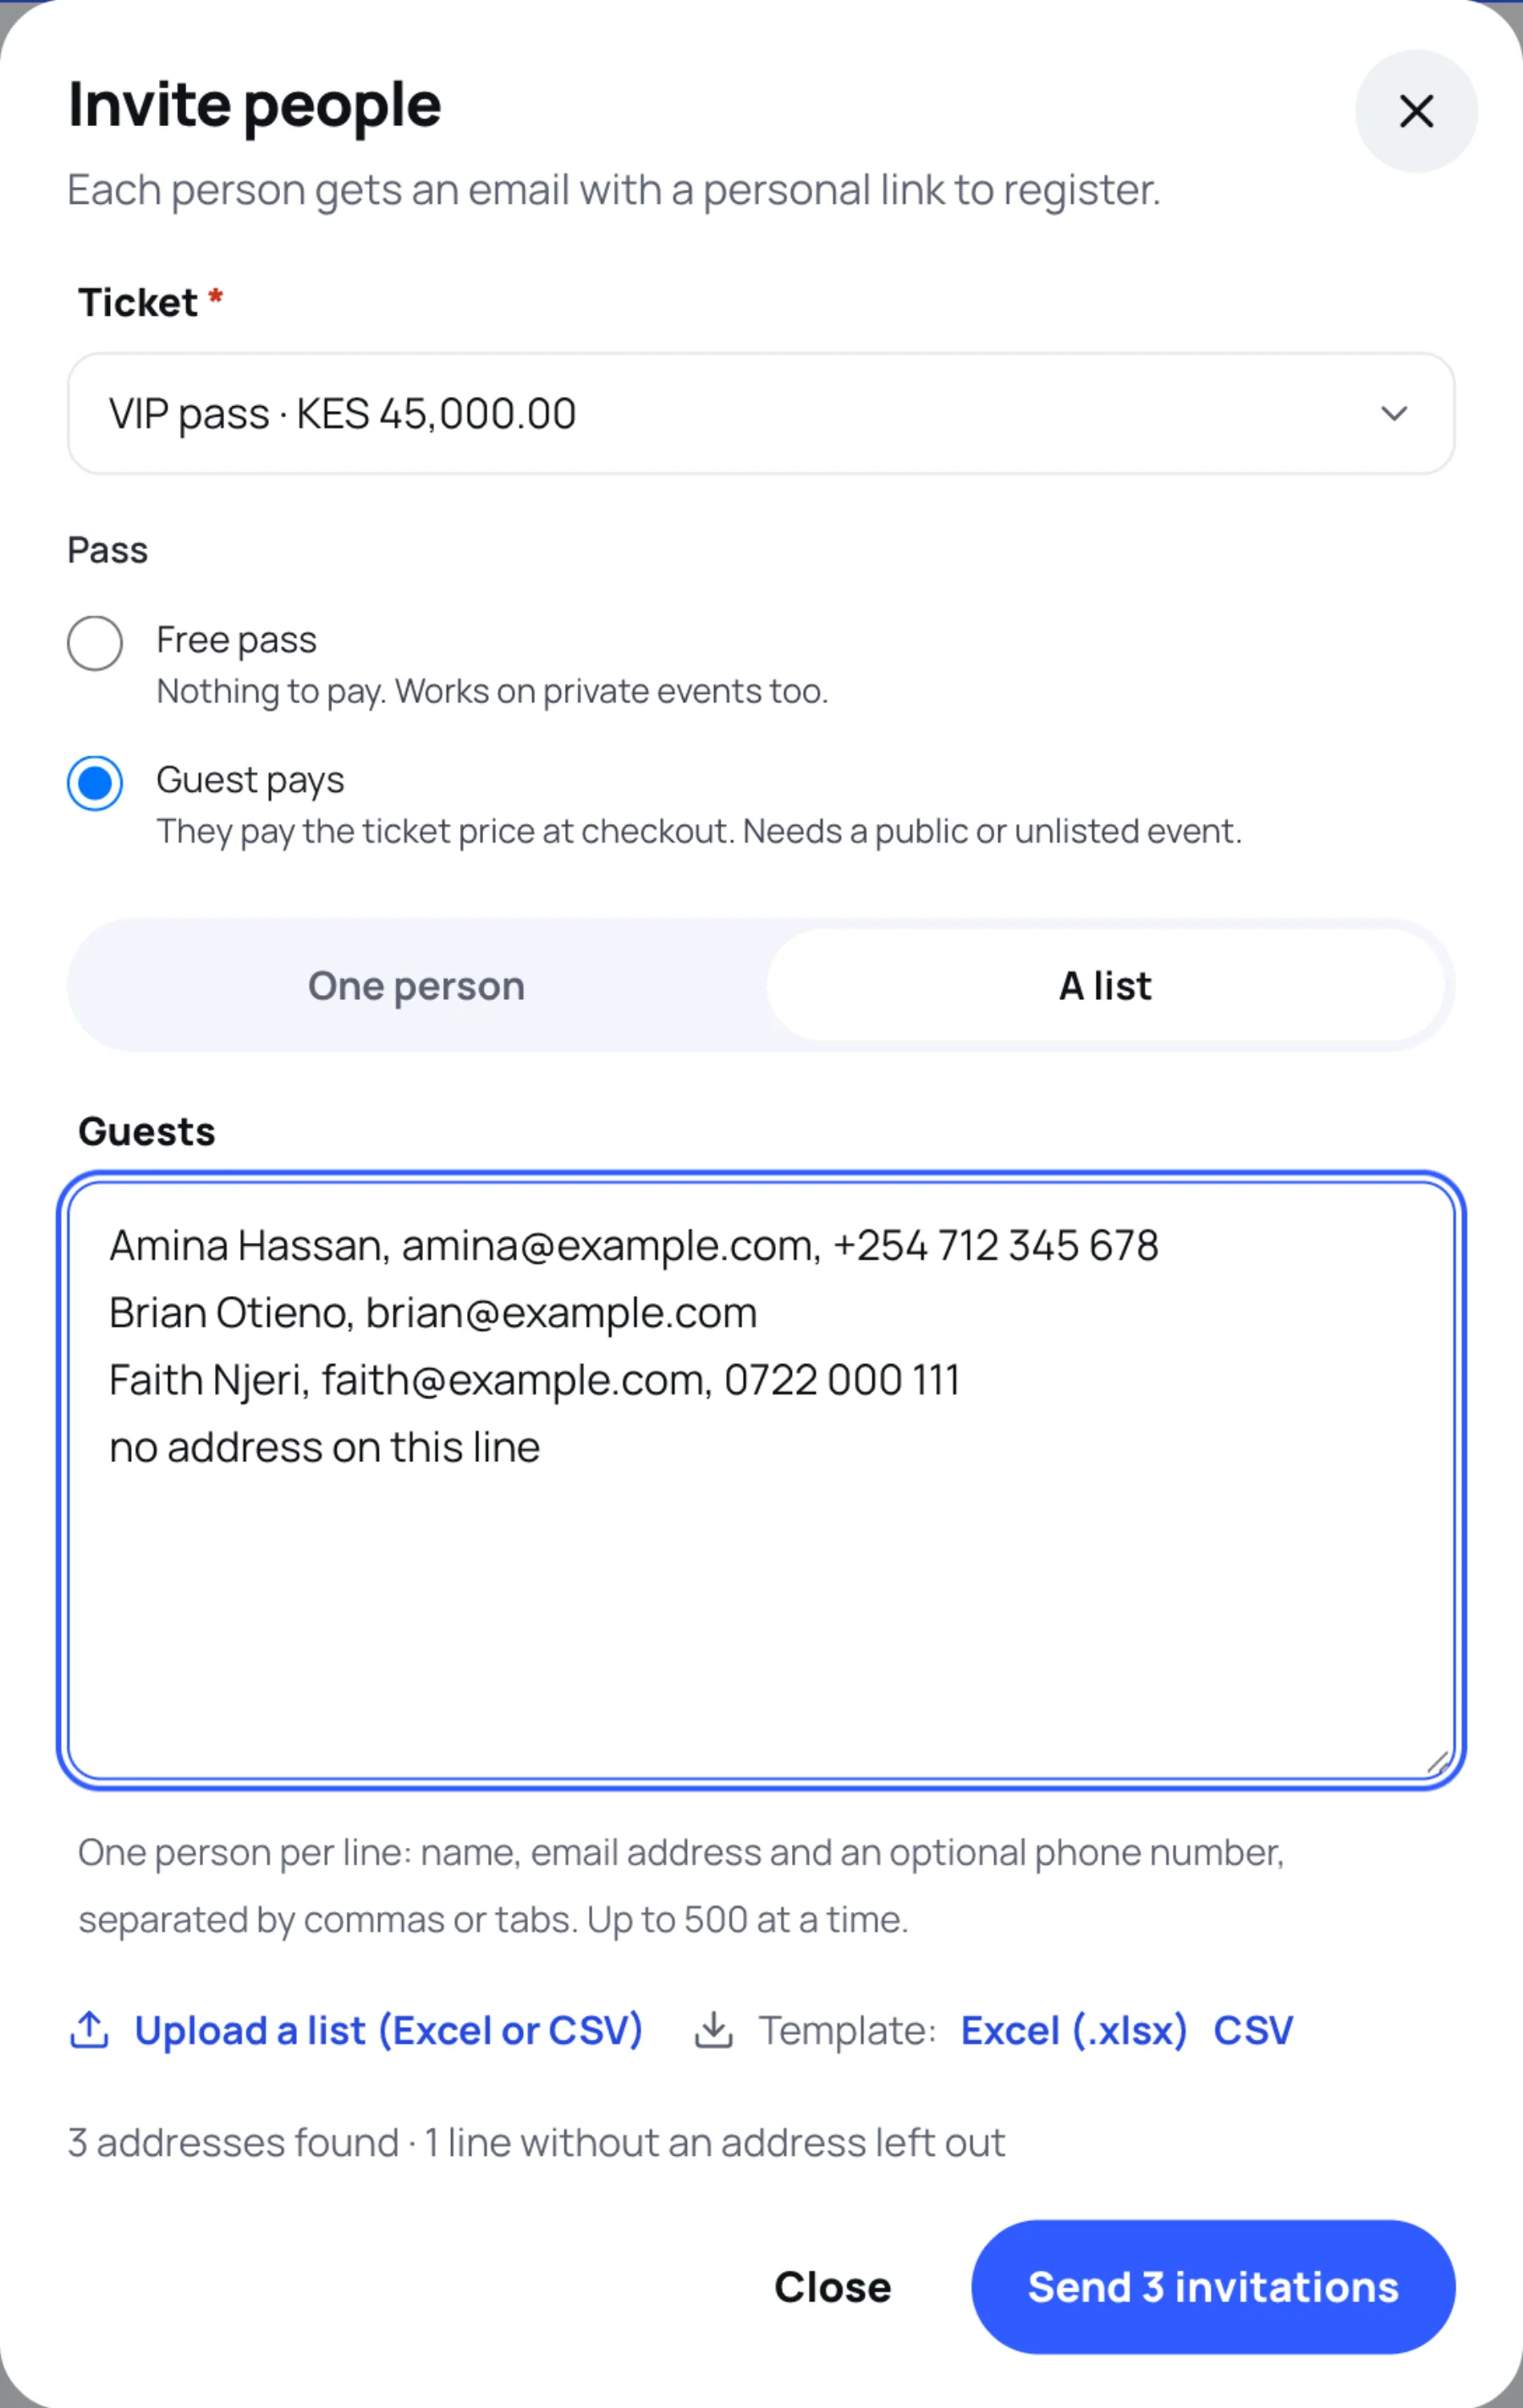
Select Invite people, choose the Ticket and the Pass.
-
Select A list.
-
In Guests, put one person per line: their name, email address and an optional phone number, separated by commas. Or upload a filled-in template: see use the guest list template.
Under the box, Zufest counts the addresses it found and the lines it left out because they had no address.
-
Select Send 3 invitations (the button shows the count). You can send up to 500 at a time.
Use the guest list template
For a long list, fill in the template in Excel, Google Sheets or Numbers and upload it.
-
Select Invite people, then A list.
-
Next to Template:, select Excel (.xlsx) or CSV. The Excel template has your event's name at the top and three columns:
Column Name The guest's full name Email Required. The invitation is sent here Phone number Optional. Kept as text, so a leading + or 0 stays -
Fill in one guest per row, from row 5. Leave the title rows and headings as they are.
-
Save the file, then select Upload a list (Excel or CSV) and choose it. The guests appear in the box so you can check them before sending.
Your own spreadsheet works too, as long as it has a heading row with Email. Zufest reads the Name (or First name and Last name), Email and Phone number (or Mobile) columns and leaves any others, such as Organisation, alone. Old Excel files (.xls) cannot be read: save them as .xlsx or CSV first.
The phone number is not sent anywhere. Your team sees it in the Invitations list, and it fills in the phone field of the guest's registration form, where they can change it.
If some could not be invited, a summary lists each address with the reason: Not a valid address, Listed twice, Already invited, Already registered or Already accepted. The rest are sent.
What the guest does
- Free pass: they fill in the form and create their account with the invited address. They get a confirmed place and a badge.
- Guest pays: they go through the ordinary checkout with the ticket already chosen, and pay. The invitation is accepted when the order is confirmed.
Only the invited email address can accept. An invitation skips the pass's review. A free pass also works outside the pass's sales dates.
Resend or revoke
- Resend sends a new link. The old link stops working.
- Revoke ends a waiting or expired invitation. You can invite the address again later.
An invitation nobody accepts expires when the event ends.
Last updated