Approve exhibitors
Every exhibitor and sponsor at your event has a stand on the Exhibitors and sponsors screen. A stand stays hidden from attendees until you approve it, so you can add companies early and publish them once everything is agreed.
Read the stand list
In the organiser sidebar, under Content, select Exhibitors and sponsors.
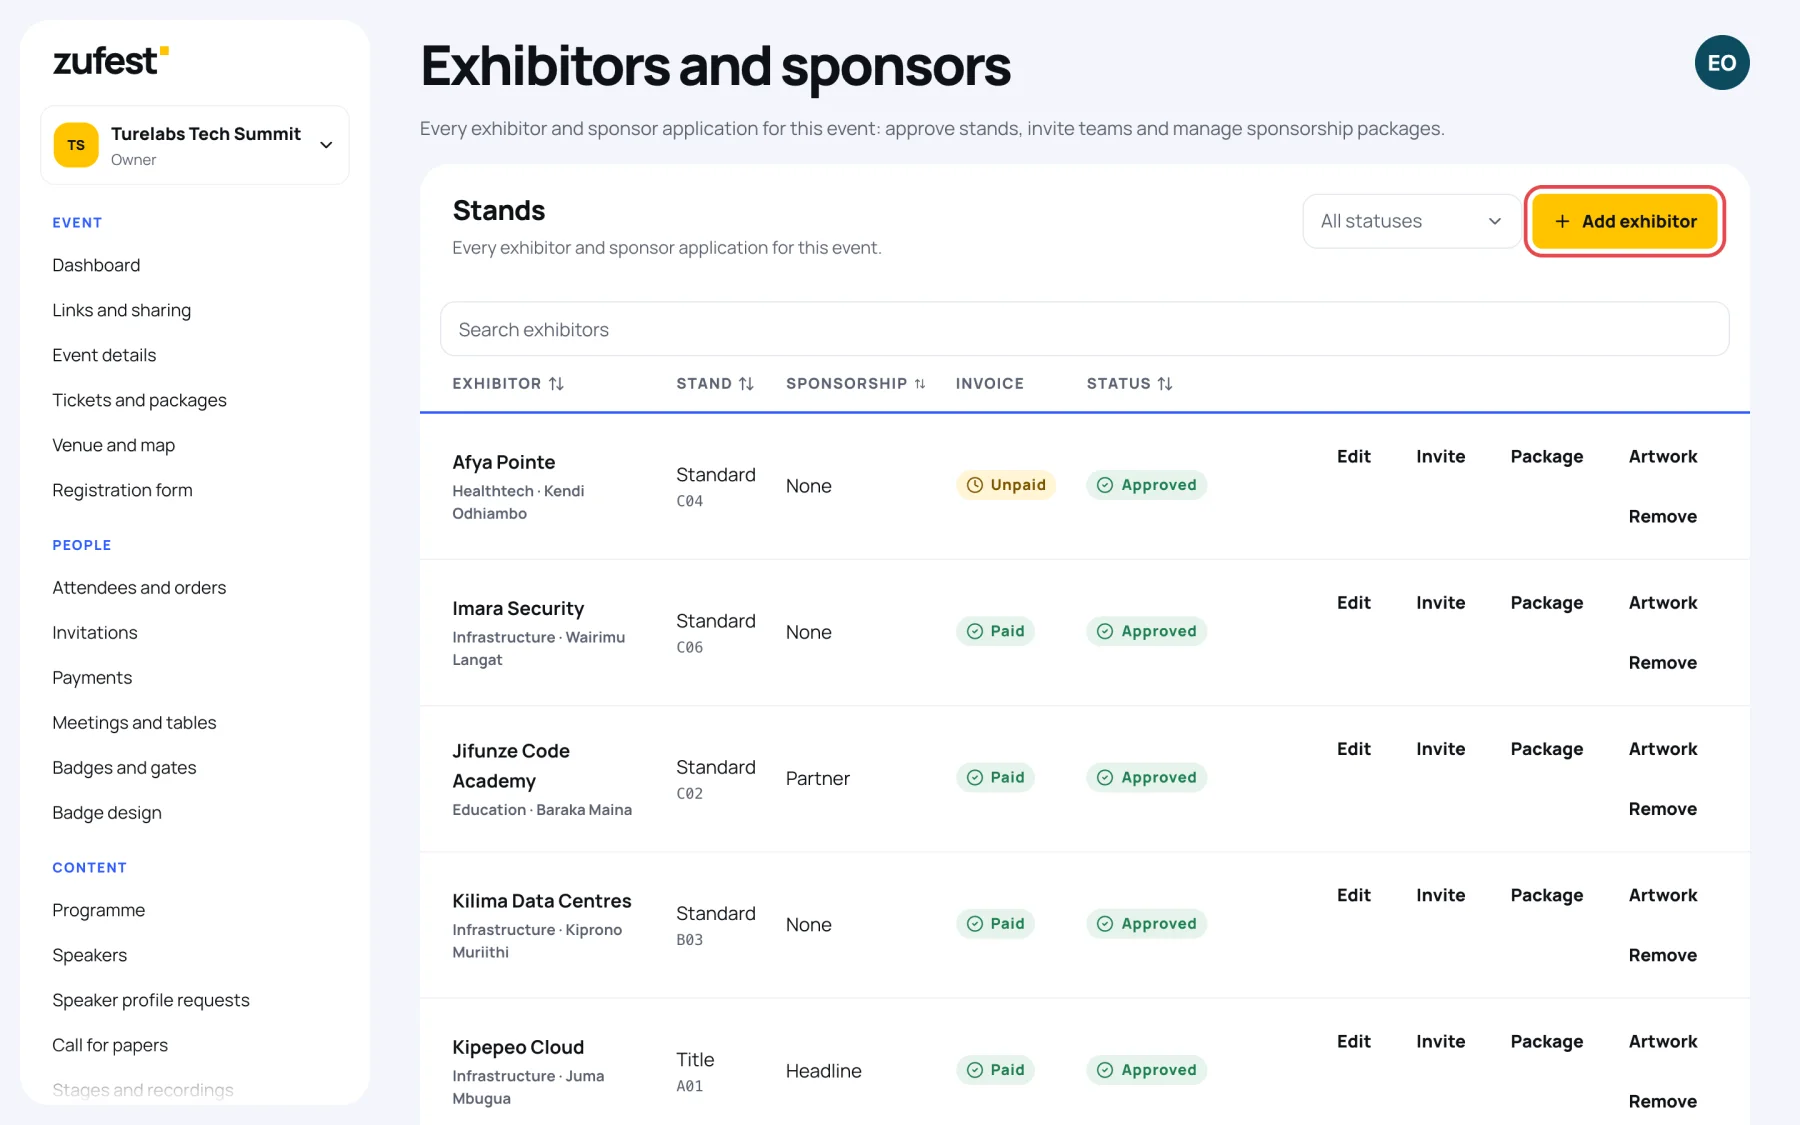
Each row shows:
- Exhibitor: the company, its category and the stand manager.
- Stand: the stand tier (Standard, Premium or Title) and the booth number.
- Sponsorship: the sponsor tier, or None.
- Invoice: Paid or Unpaid, as you mark it.
- Status: where the application stands.
Use Search exhibitors to find a company, or the All statuses menu to see only one status.
| Status | Attendees see the stand? |
|---|---|
| In review | No |
| Changes requested | No |
| Declined | No |
| Approved | Yes |
Add an exhibitor
- Select Add exhibitor.
- Under Stand page, fill in the Company or organisation name and choose a Category. Both are required. Add the logo, cover image, tagline, website, description and countries now or later.
- Under Placement and status, add the Booth number and the Stand tier.
- Leave Application status as In review until you are ready to publish.
- Select Save.
Review and approve
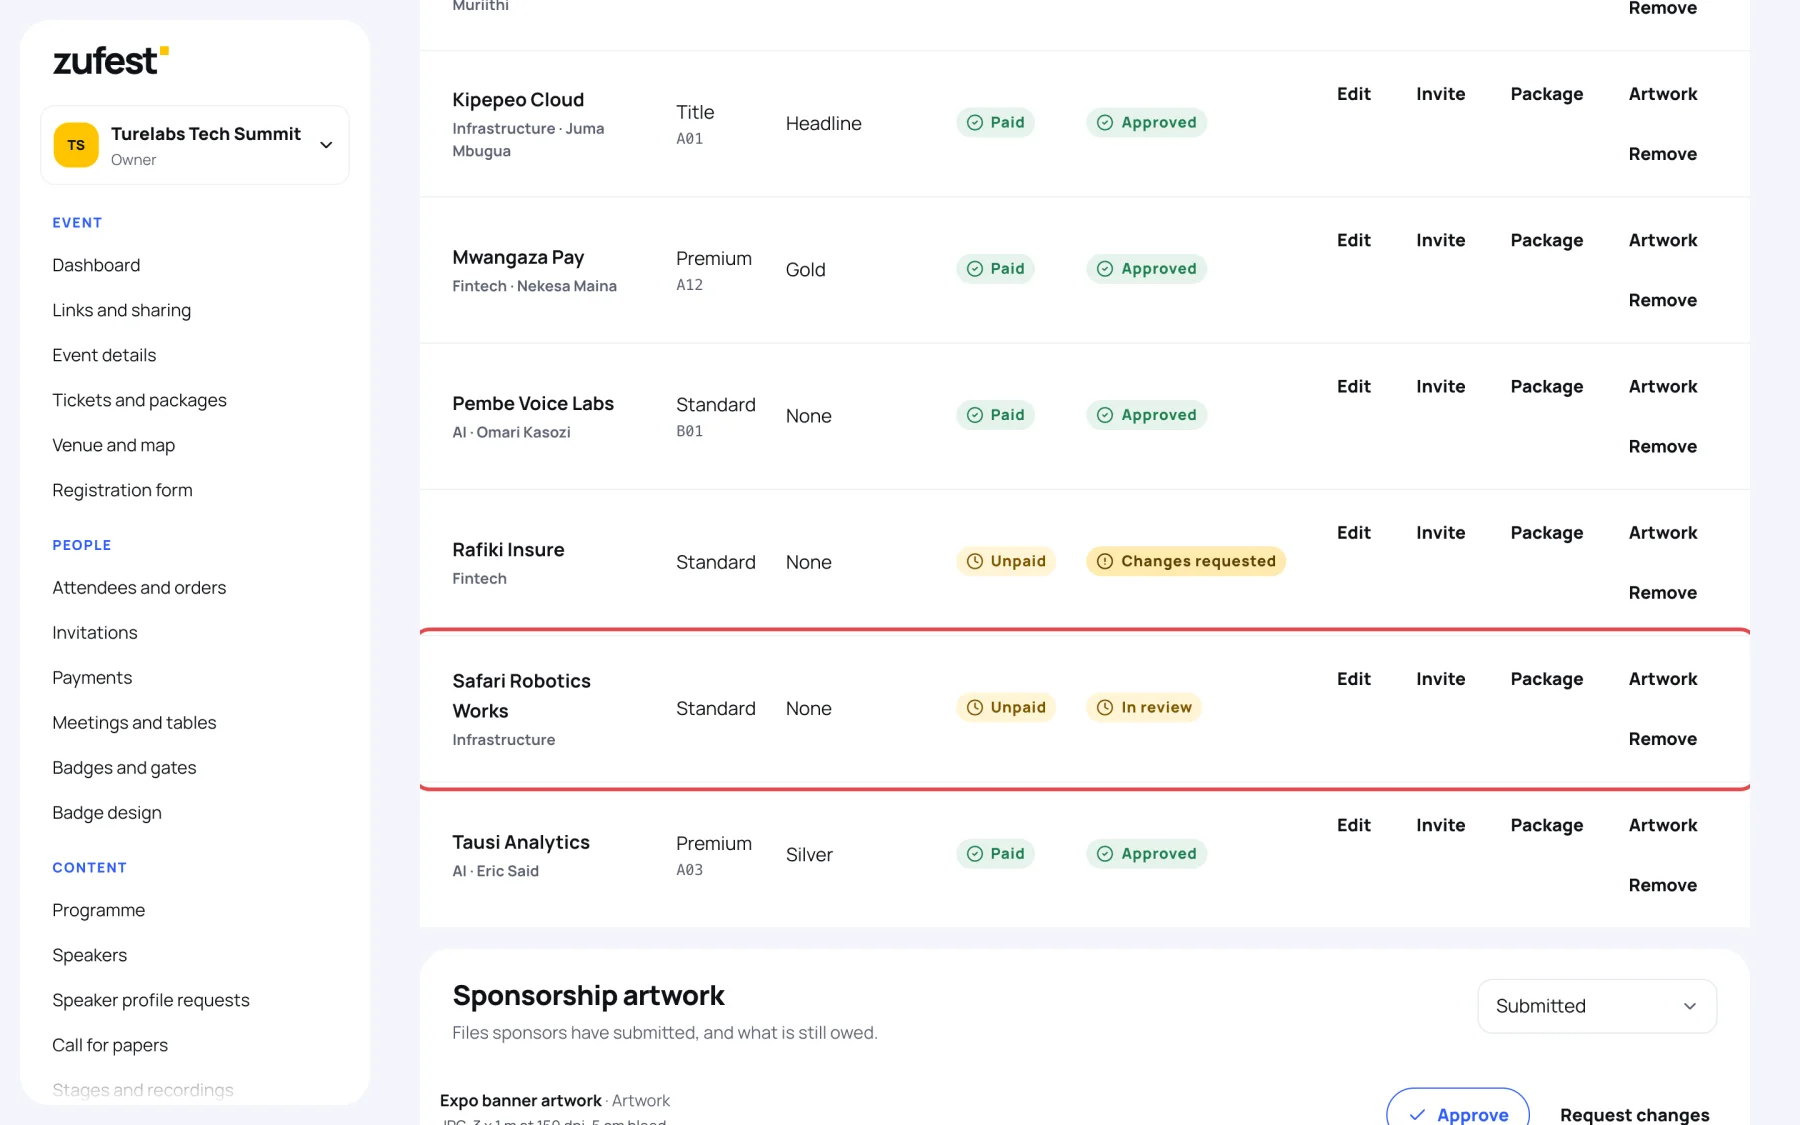
In Turelabs Tech Summit, Safari Robotics Works is In review and Rafiki Insure has Changes requested.
-
Select Edit on the stand.
-
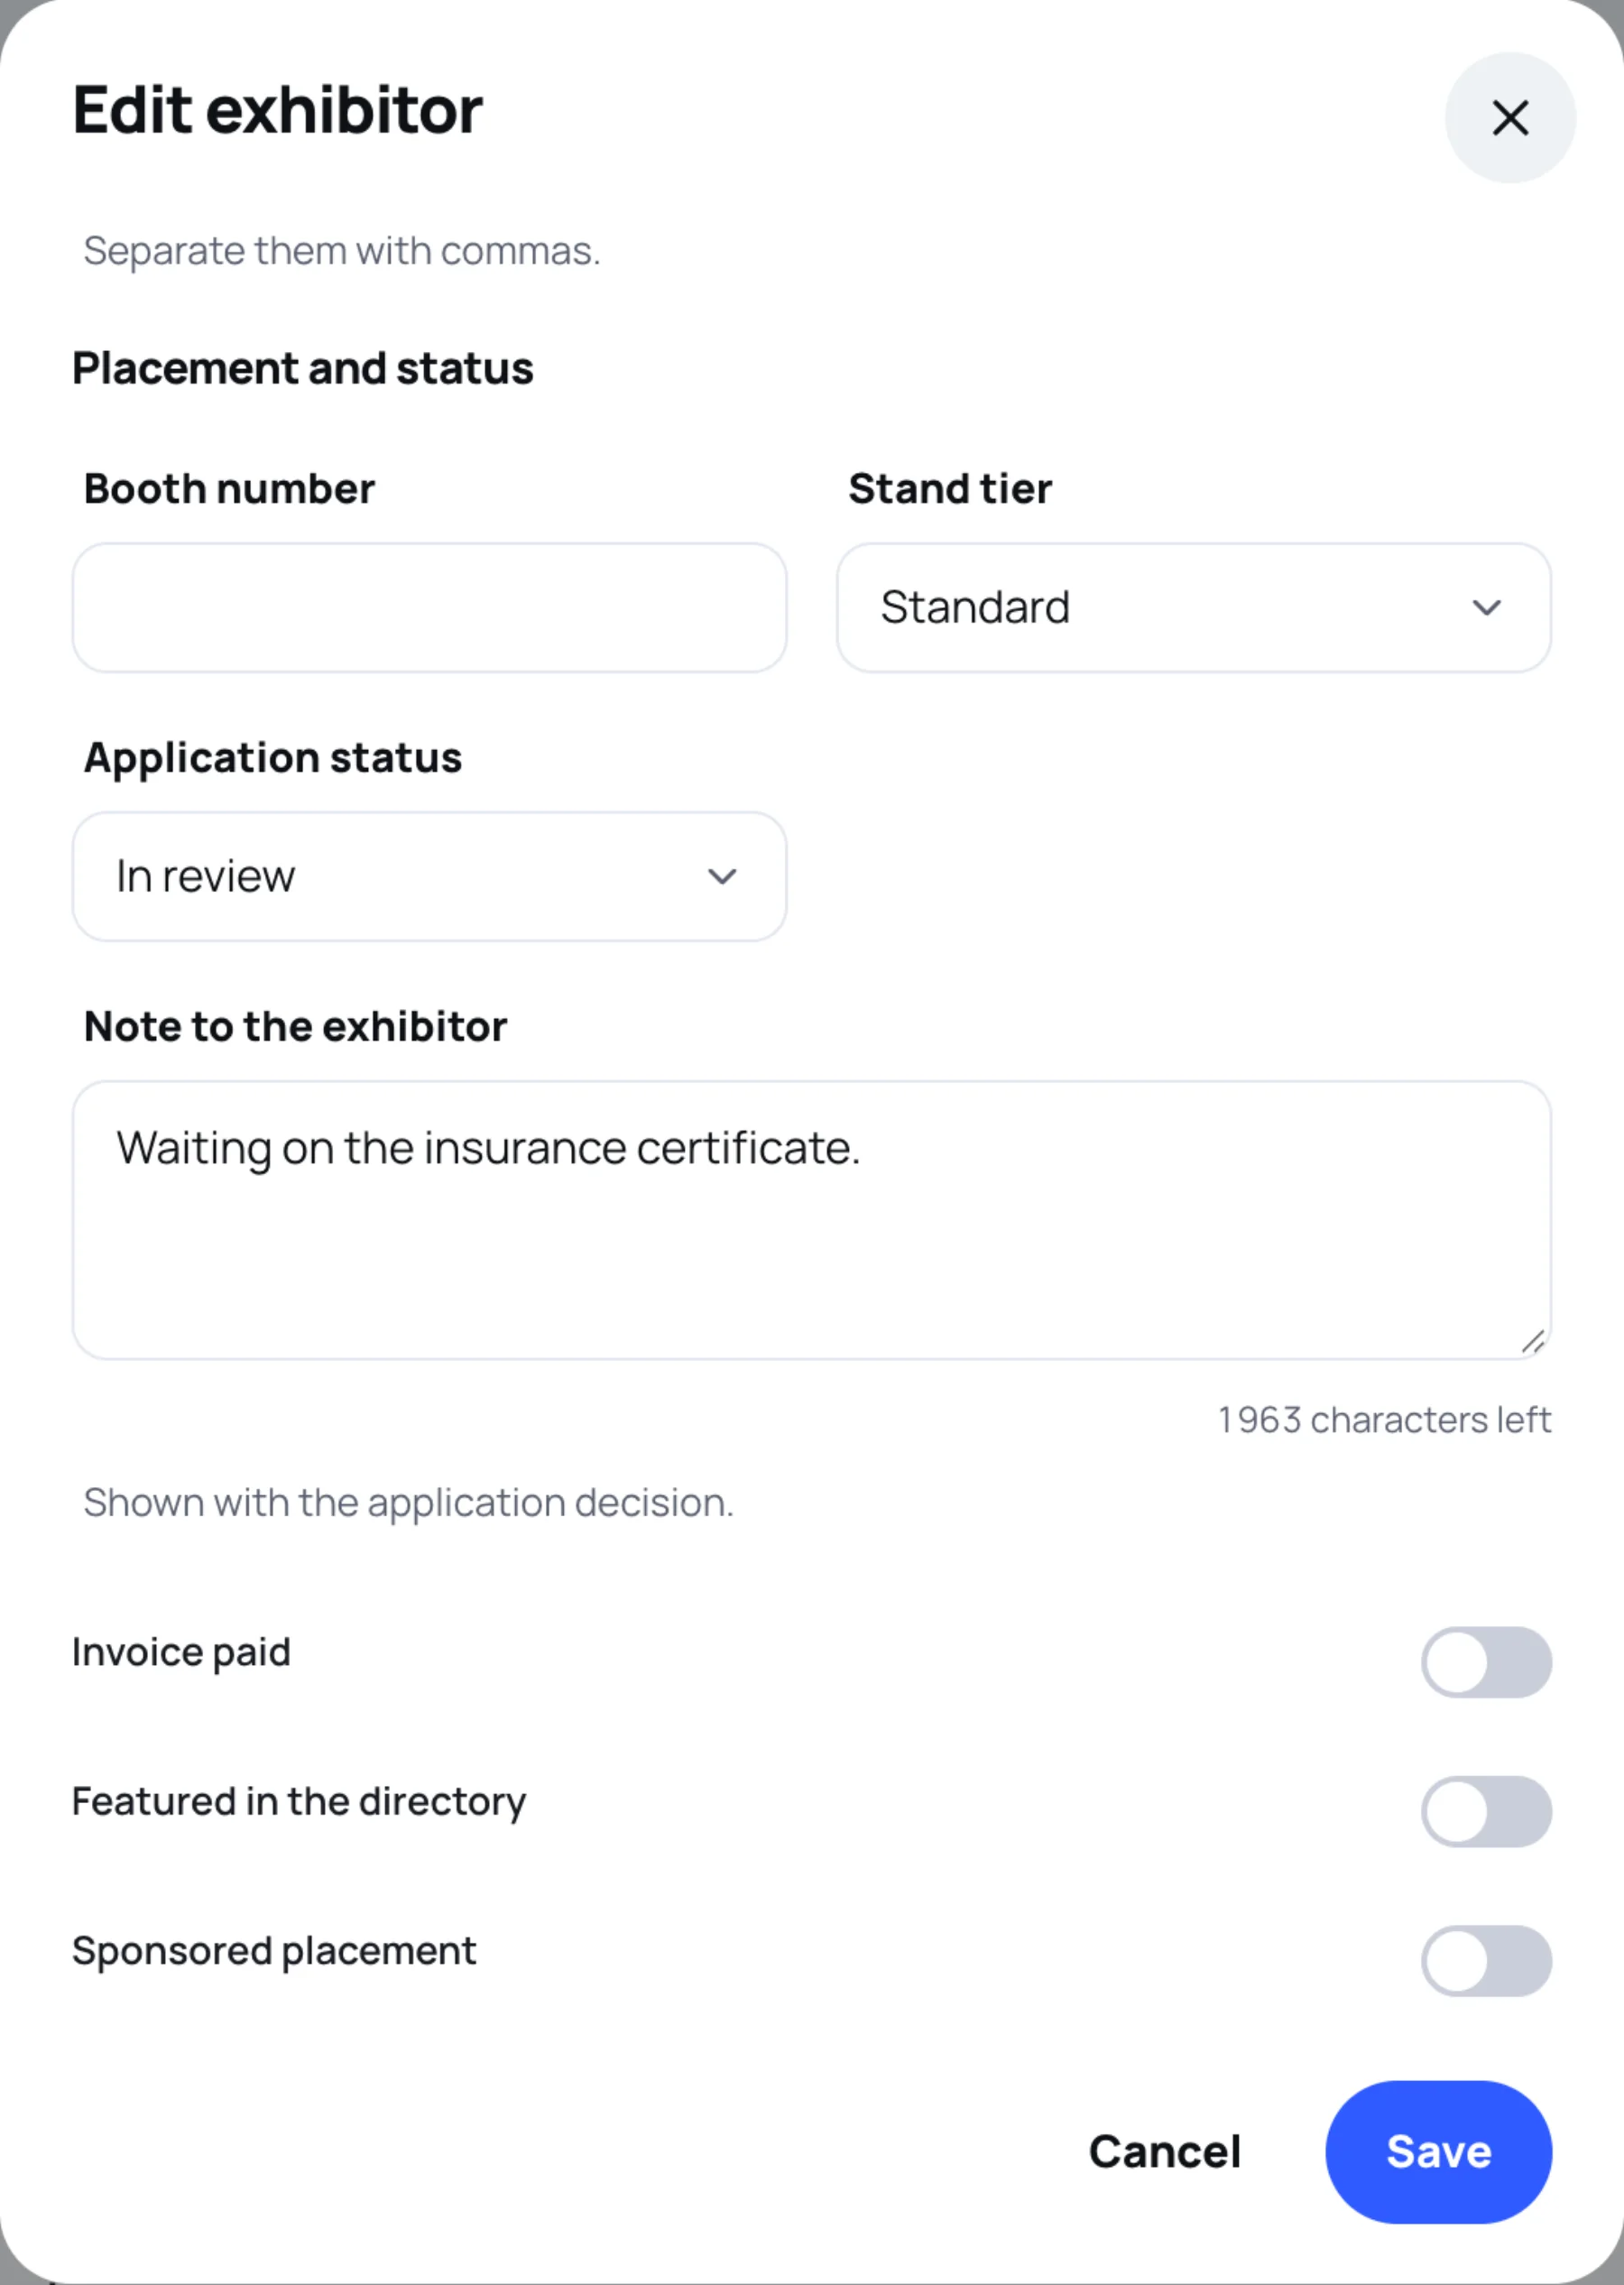
Check the details, then change Application status:
- Approved publishes the stand to attendees.
- Changes requested keeps it hidden while the company fixes something.
- Declined keeps it hidden for good.
-
Use Note to the exhibitor to tell the company why, for example "Waiting on the insurance certificate." The note goes out with the decision.
-
Switch on Invoice paid once you have been paid for the stand.
-
Select Save.
Remove a stand
Select Remove on the row and confirm. The stand, its team and its sponsorship record are removed from the event.
Last updated