Design your badges
Every confirmed place gets a badge with a QR code. Badge design sets how it looks when printed: the stock, the lines on it and a colour band that tells stewards at a glance who is a speaker, an exhibitor or press.
Open Badge design
-
In the sidebar, under People, select Badge design.
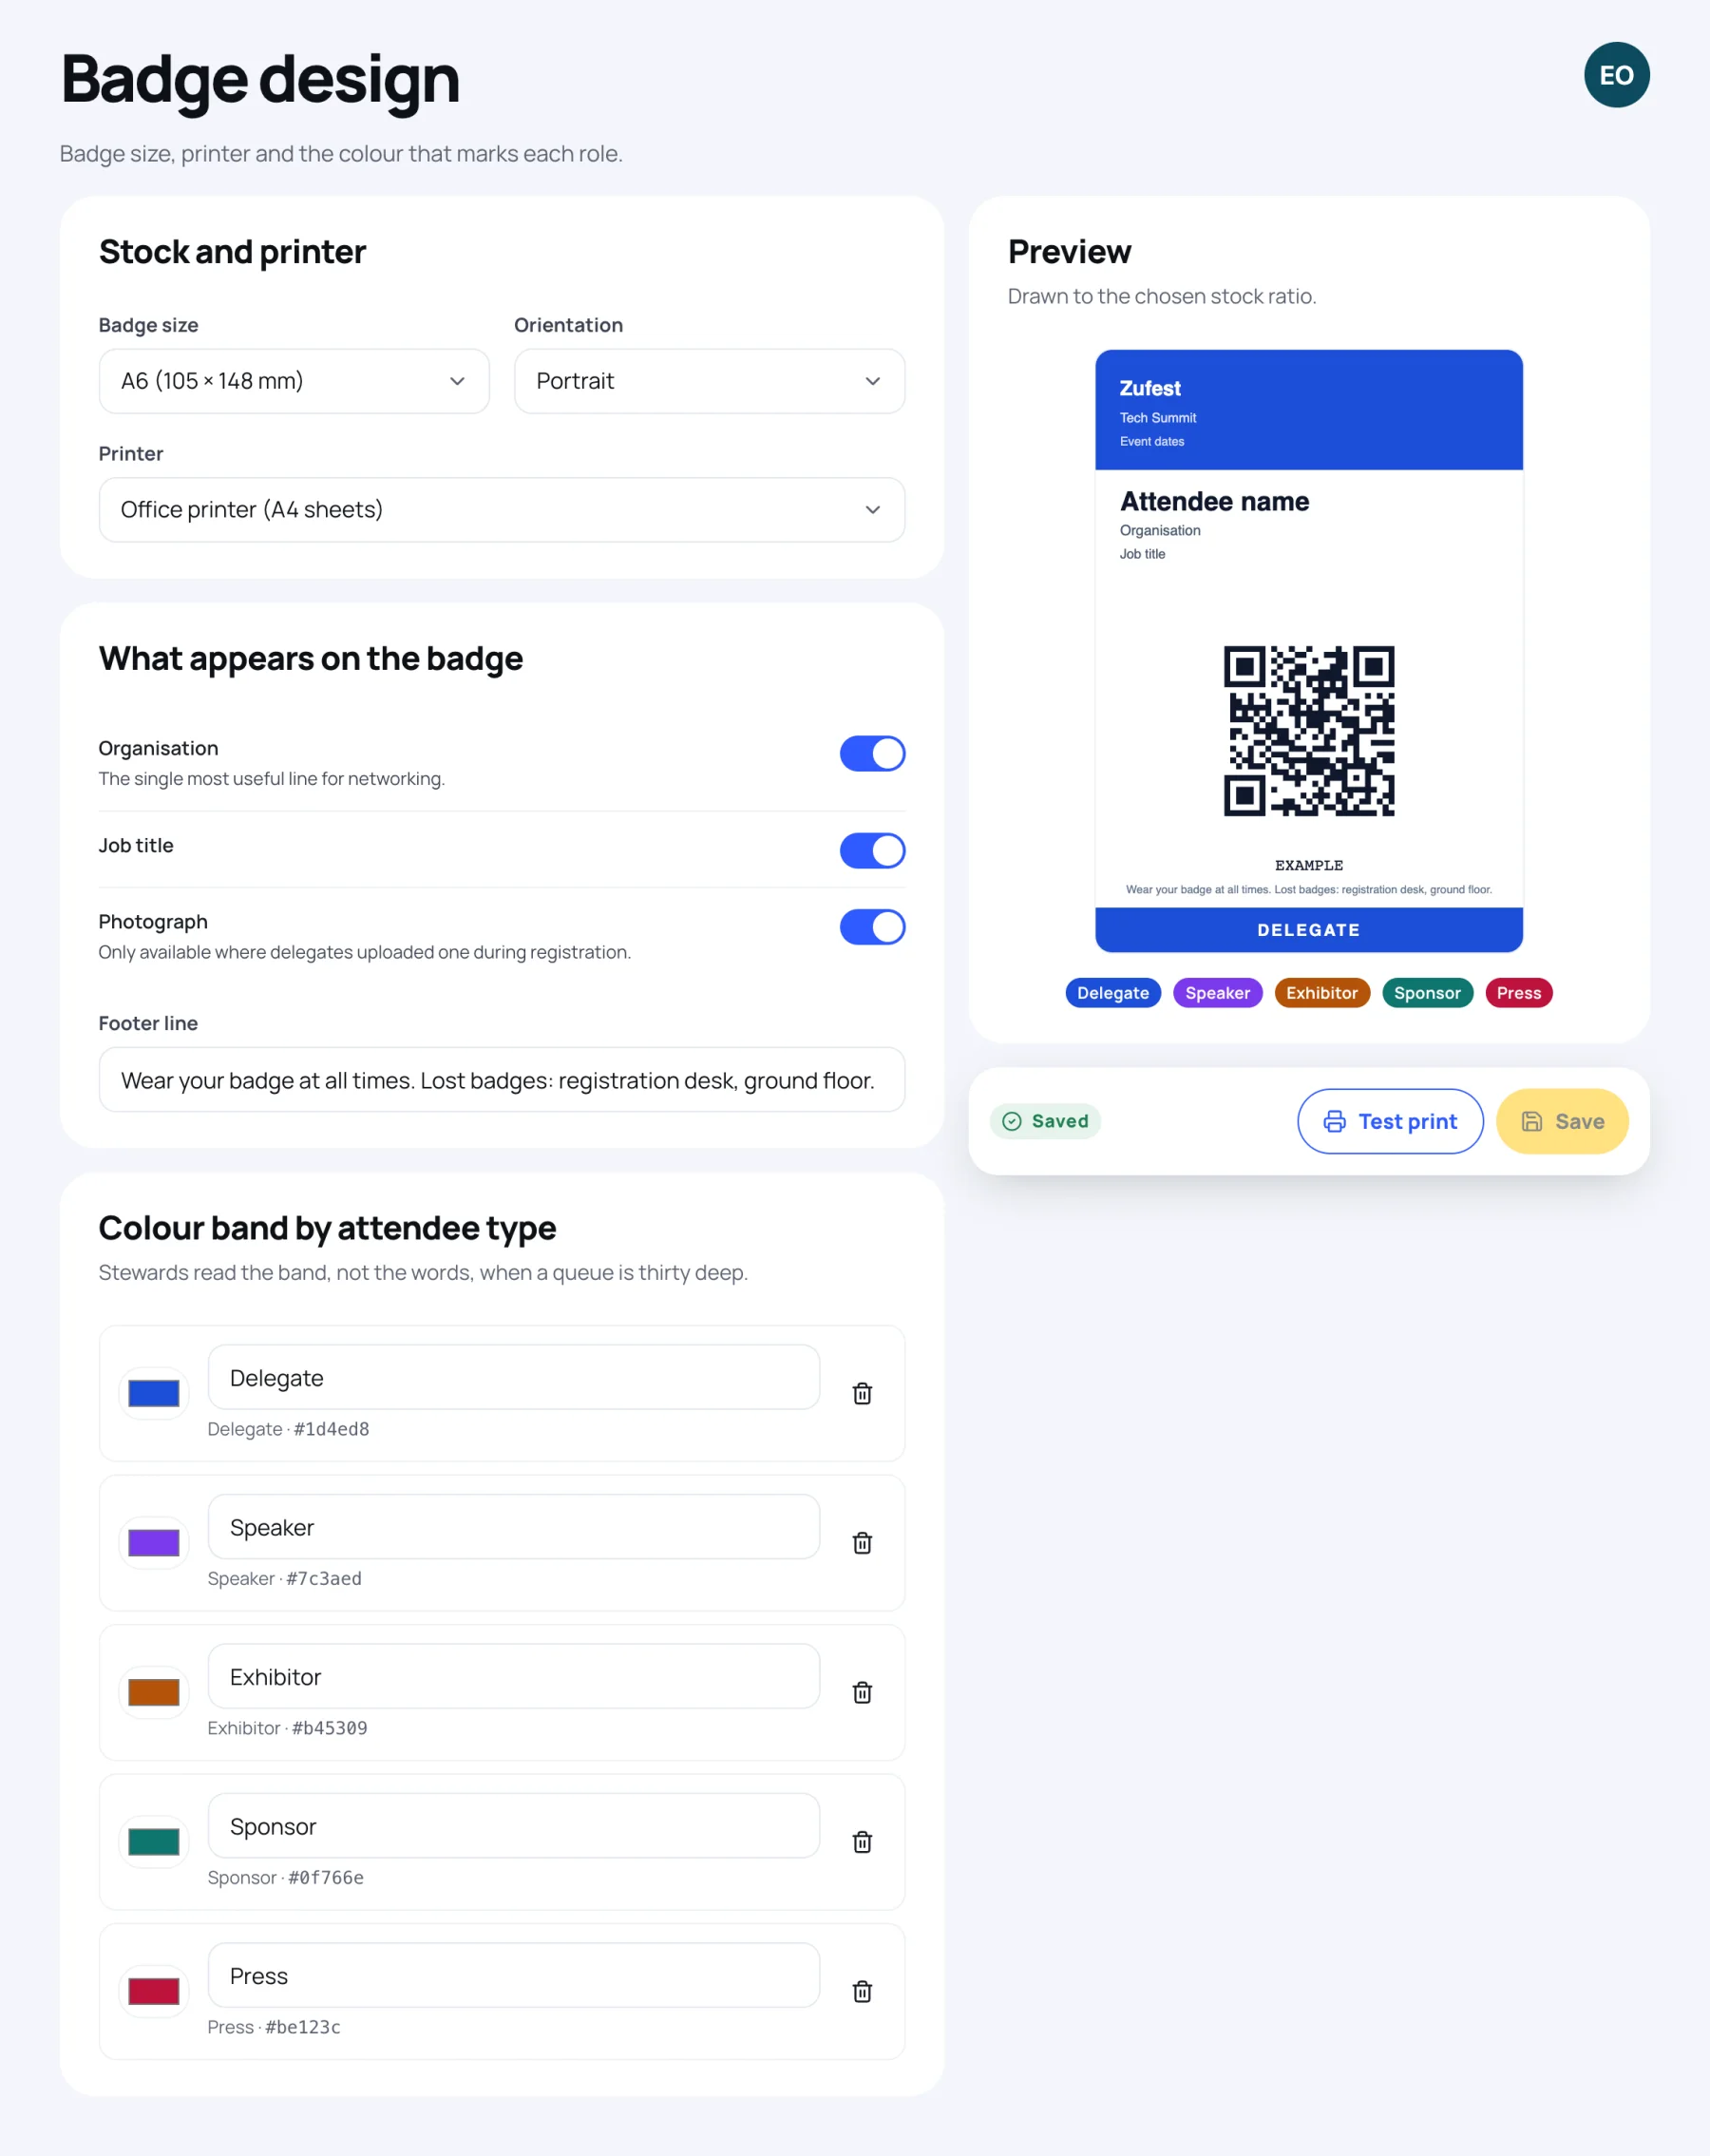
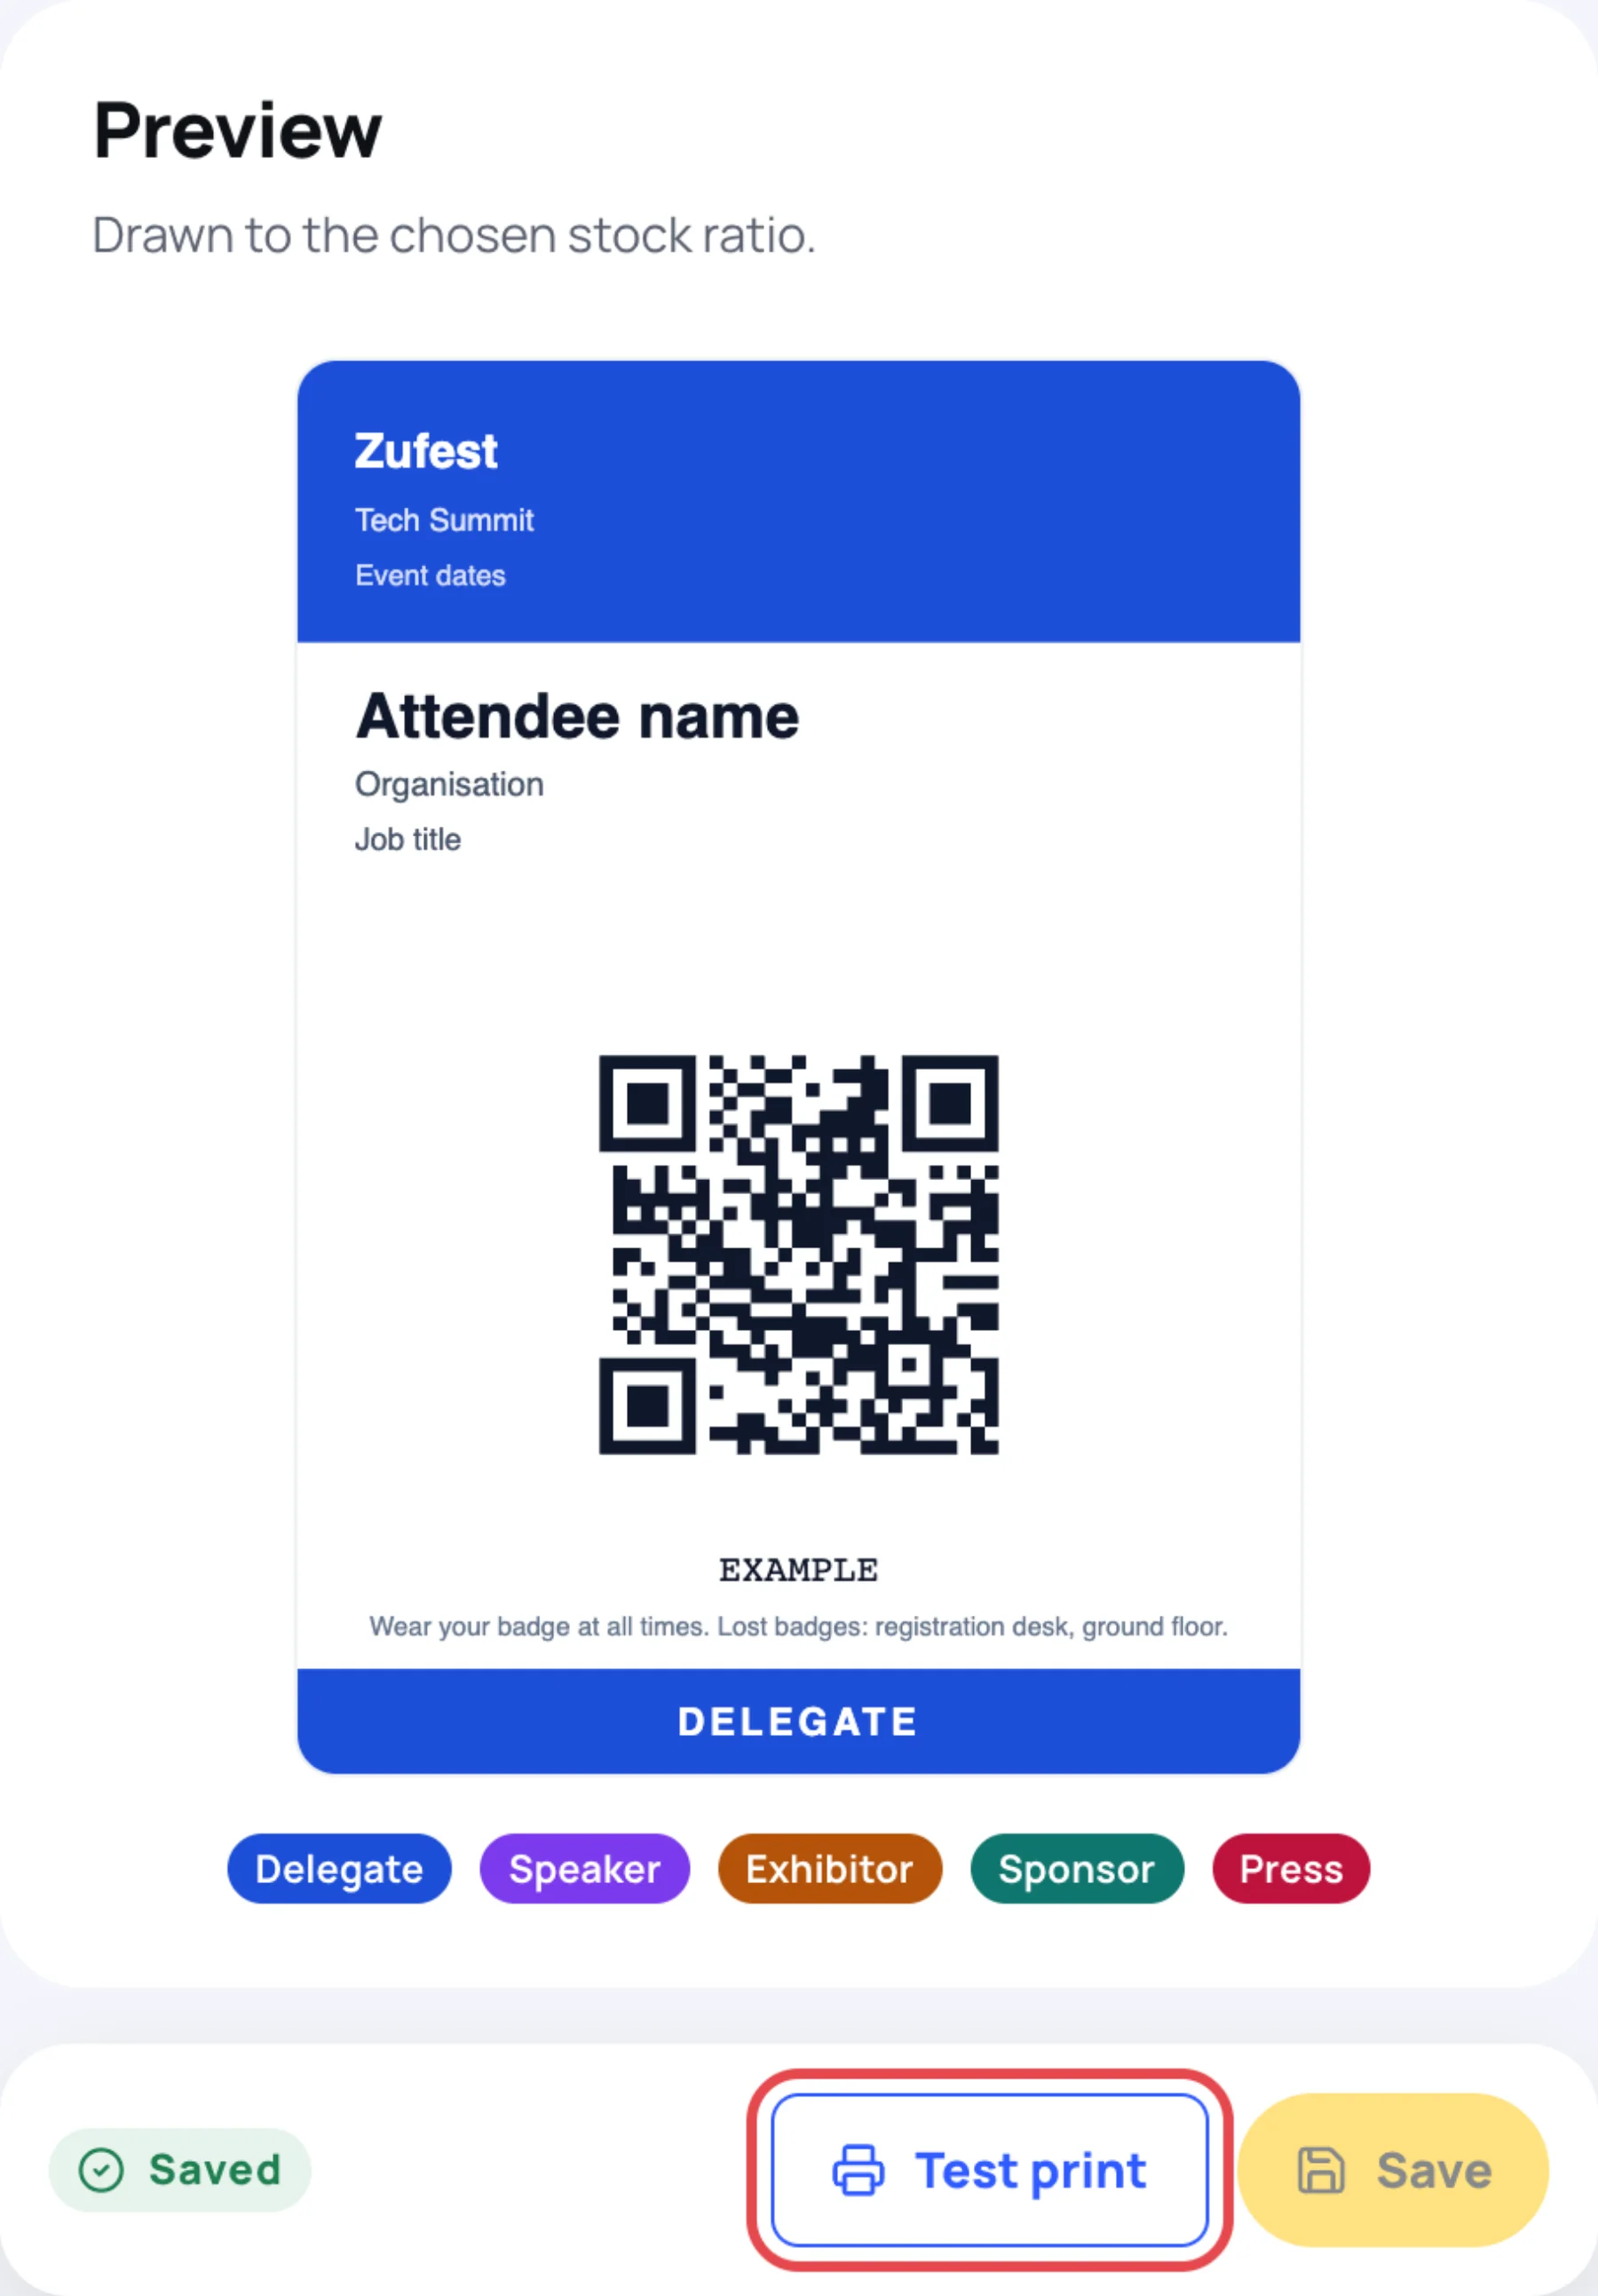
The settings are on the left. The Preview on the right is the printed artwork itself, drawn to your chosen stock.
Choose the stock and printer
-
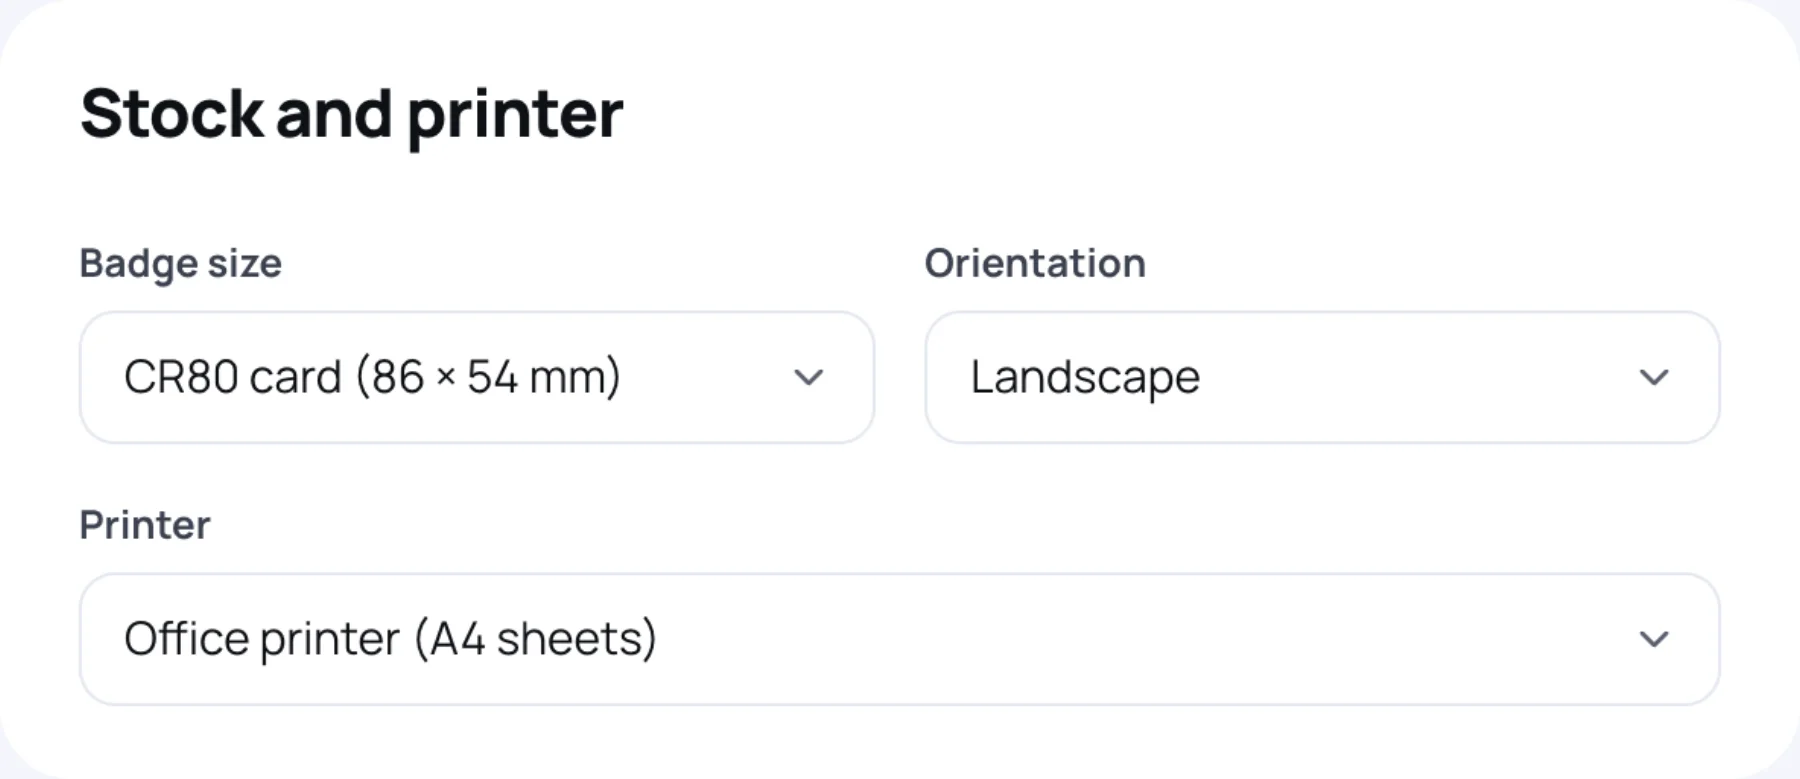
Under Stock and printer, choose a Badge size: A6 (105 × 148 mm), A7 (74 × 105 mm) or CR80 card (86 × 54 mm).
-
Choose the Orientation: Portrait or Landscape.
-
Choose your Printer: Zebra ZC300 (on-site card printer), Evolis Primacy 2 or Office printer (A4 sheets).
Choose what appears
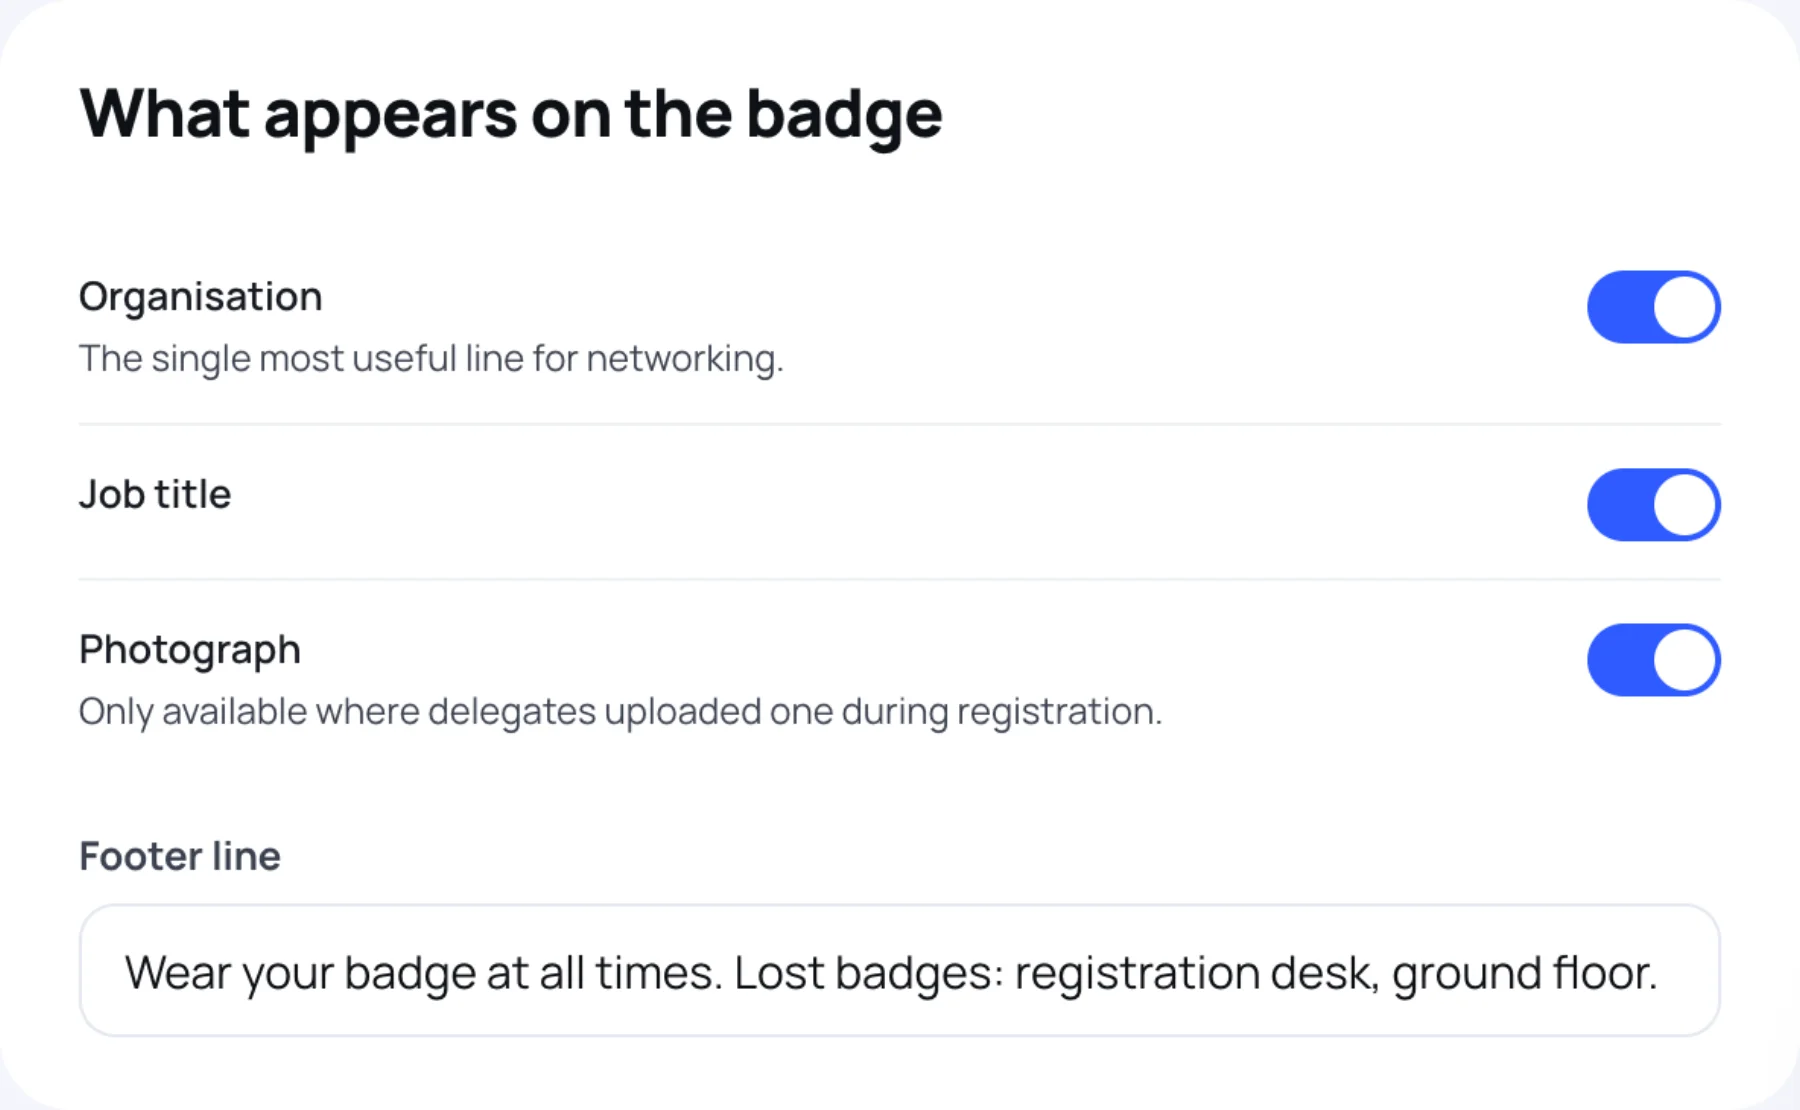
Under What appears on the badge, switch each line on or off:
- Organisation: the single most useful line for networking.
- Job title.
- Photograph: only where the person uploaded one during registration.
Then type a Footer line, for example where to get help with a lost badge.
The attendee's name and the QR code are always on the badge.
Set a colour band for each attendee type
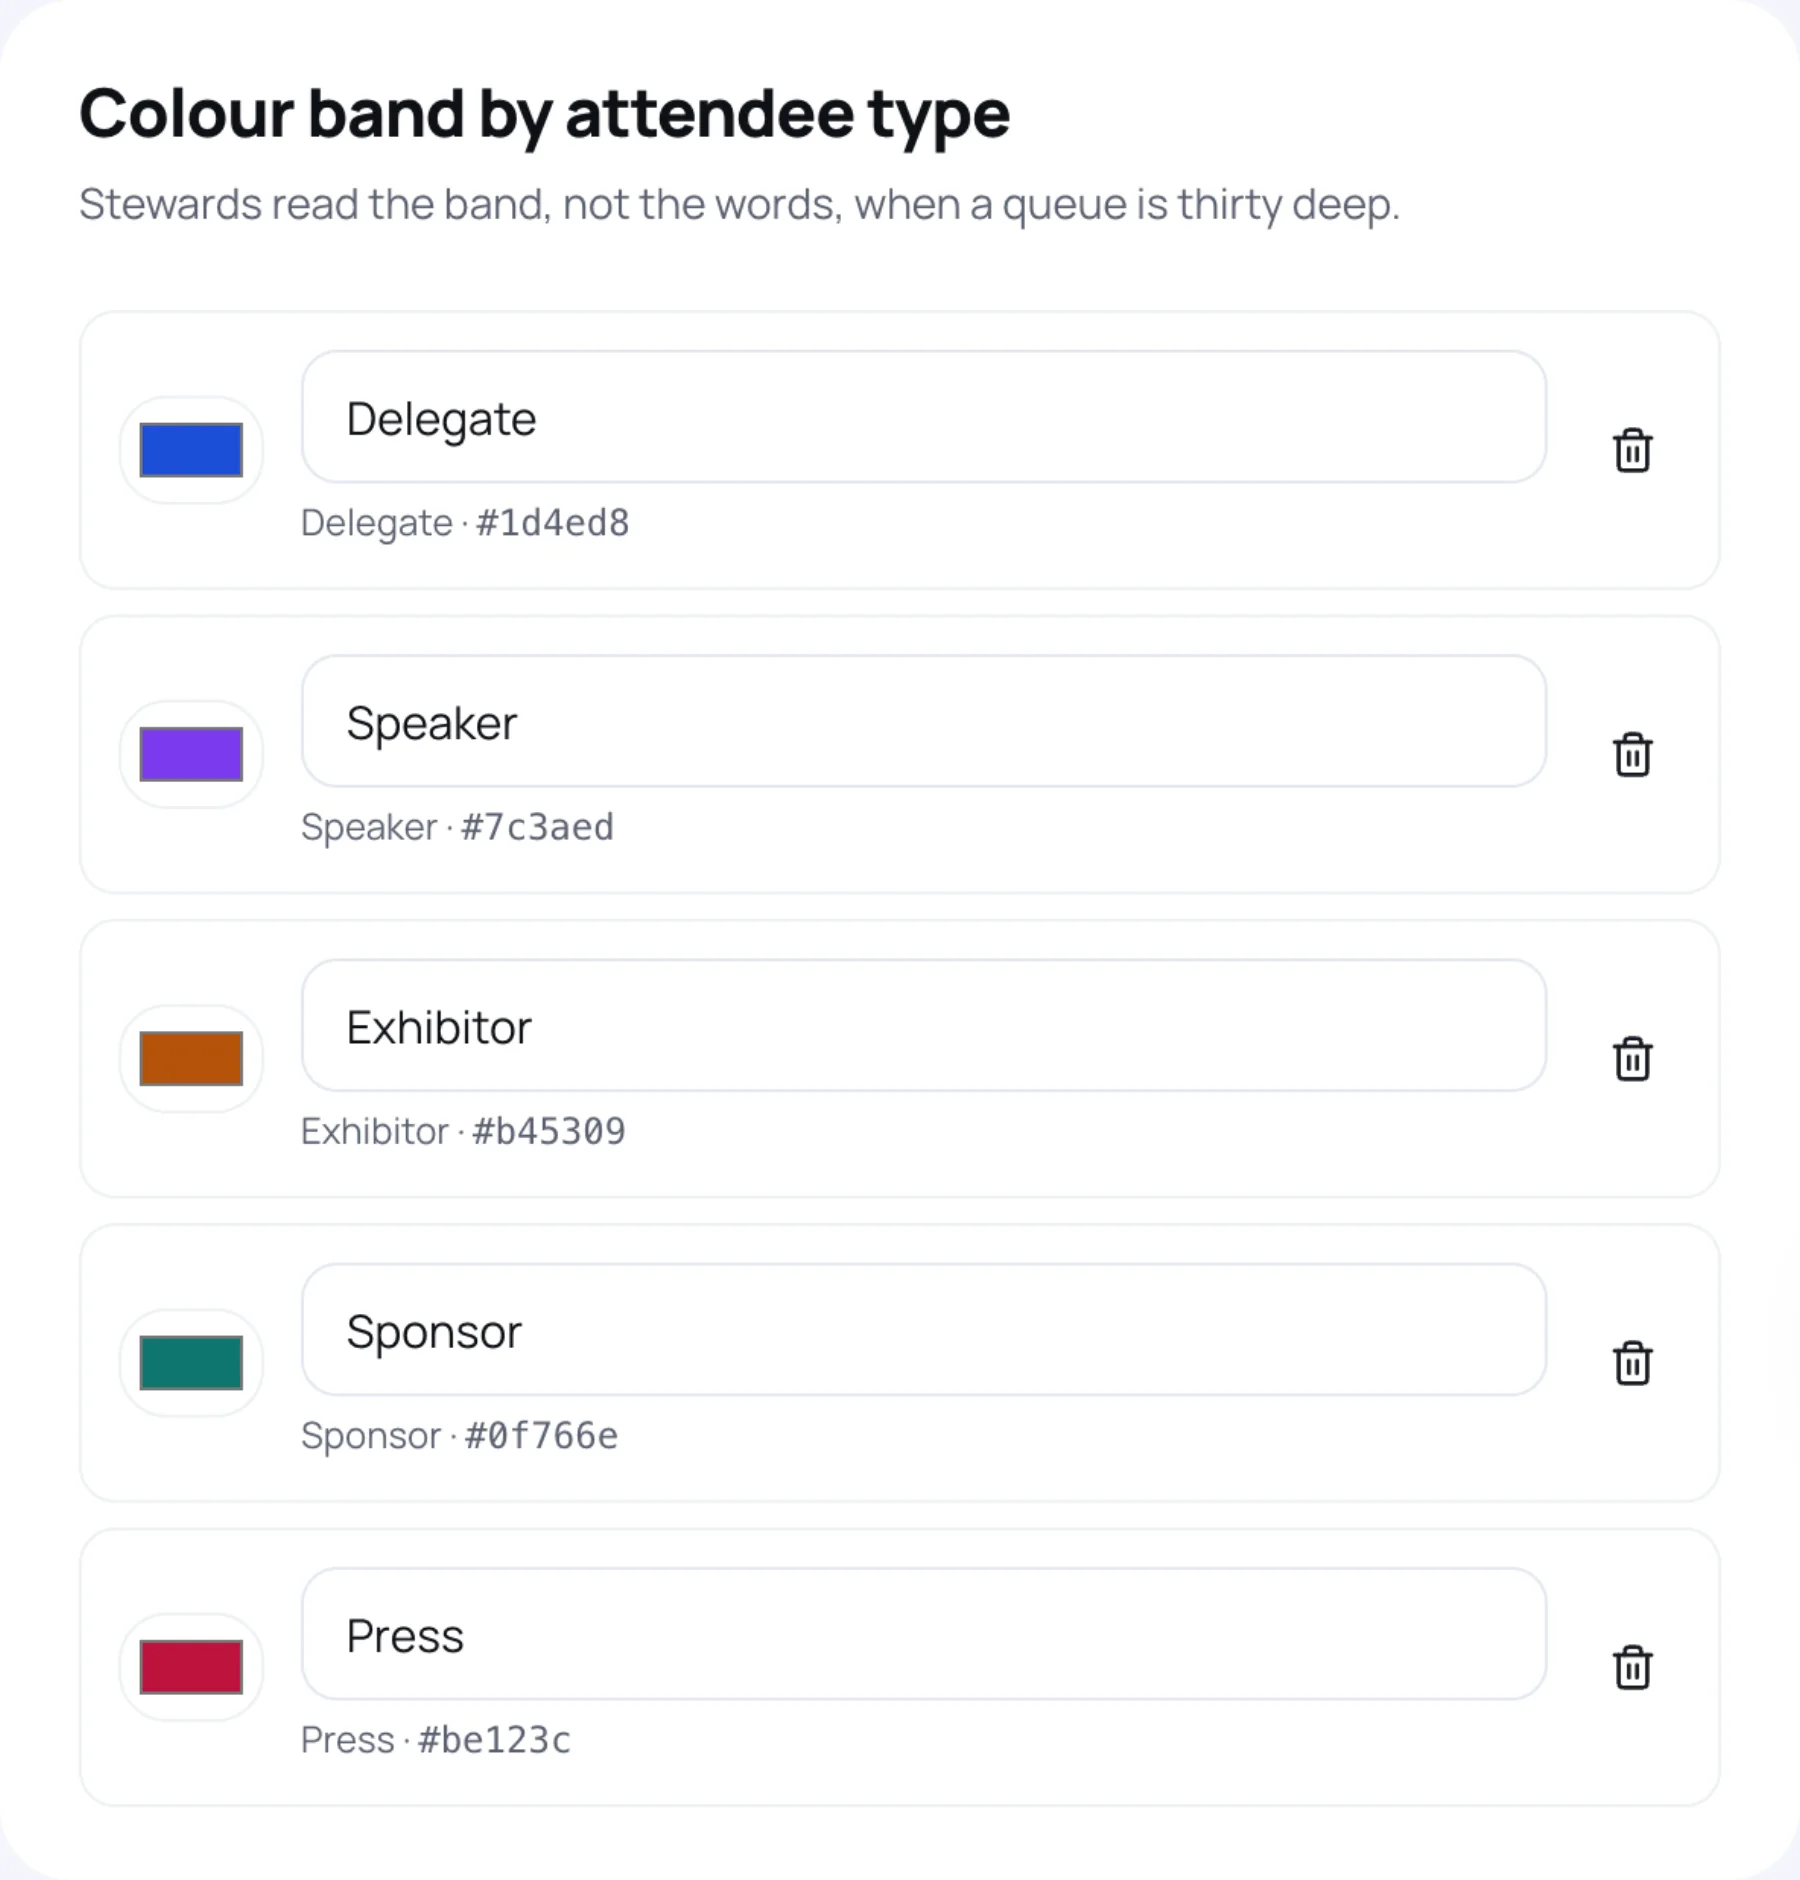
Each ticket type admits people as a Delegate, Speaker, Exhibitor, Sponsor or Press (set in Admits as on the ticket). The band at the bottom of the badge takes that type's colour and label.
-
Under Colour band by attendee type, select a swatch to choose its colour.
-
Change the label if you like, for example "Media" instead of "Press".
-
To add a band for a type that has none, select that type's button under the list. To remove one, select the bin.
Test print and save
-
Check the Preview. The header takes your event colour from Event branding, and shows "Zufest", or your organisation's name if your organisation is white-label.
-
Select Test print to print the preview on your printer and check it fits the stock.
-
Select Save.
Badges printed at the gate and the kiosk use this design. See print badges on site.
Last updated