Set up the venue
The venue screen holds the address, the floor plans attendees see on the venue map, and the halls you schedule sessions into. Set it up before you build the programme: every column in the programme builder is a hall from here.
Add the address
-
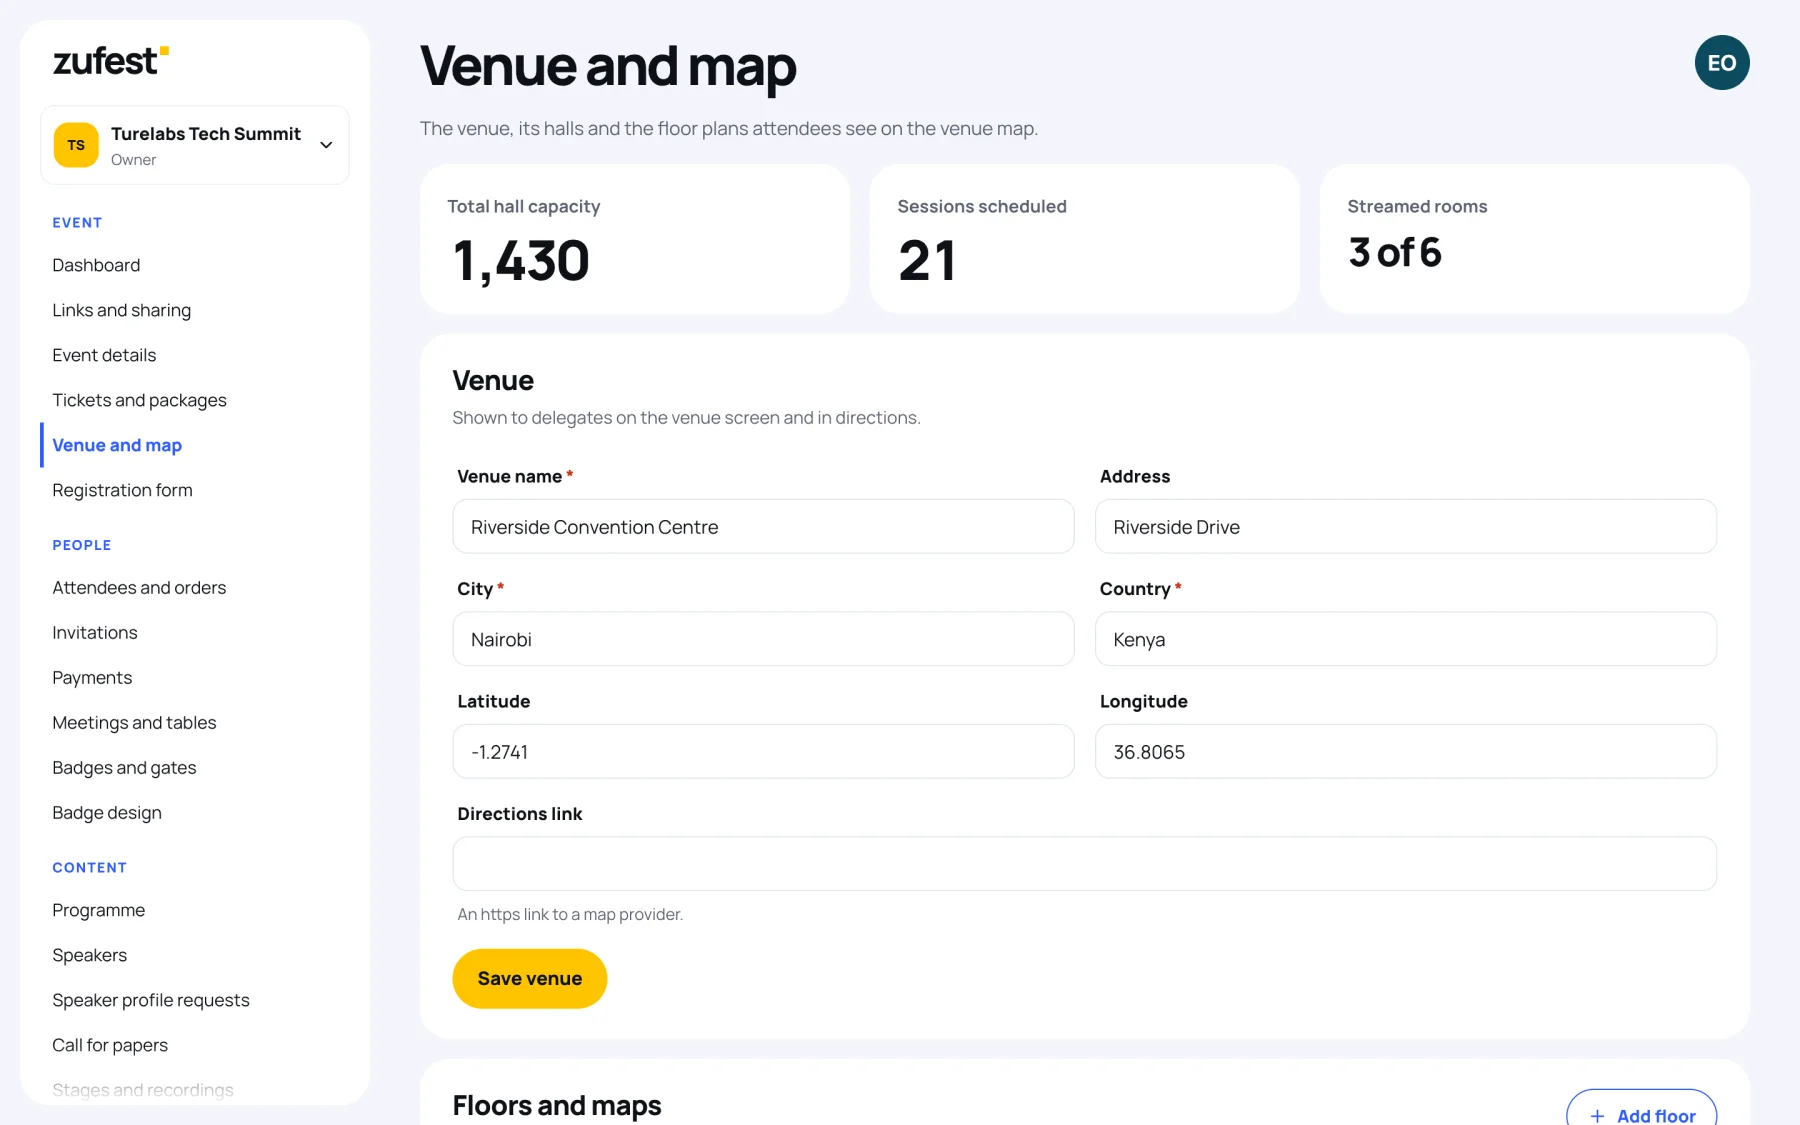
In the organiser sidebar, under Event, select Venue and map.
-
Fill in the Venue name, Address, City and Country.
-
Add Latitude and Longitude if you have them, and a Directions link: an https link to a map provider.
-
Select Save venue. The first time, the button reads Create venue.
Attendees see these details on the venue screen and in directions.
The figures at the top count the Total hall capacity, the Sessions scheduled and how many halls are Streamed rooms.
Add a floor
- Under Floors and maps, select Add floor.
- Give it a Name, for example "Ground floor", and a Level: 0 for the ground floor.
- Select Upload map and choose an image of the floor plan.
- Write a Map description for people who use a screen reader.
- Select Save floor.
Place points on the map
Points mark entrances, rooms and services, so attendees can find them.
-
Select Point beside the floor.
-
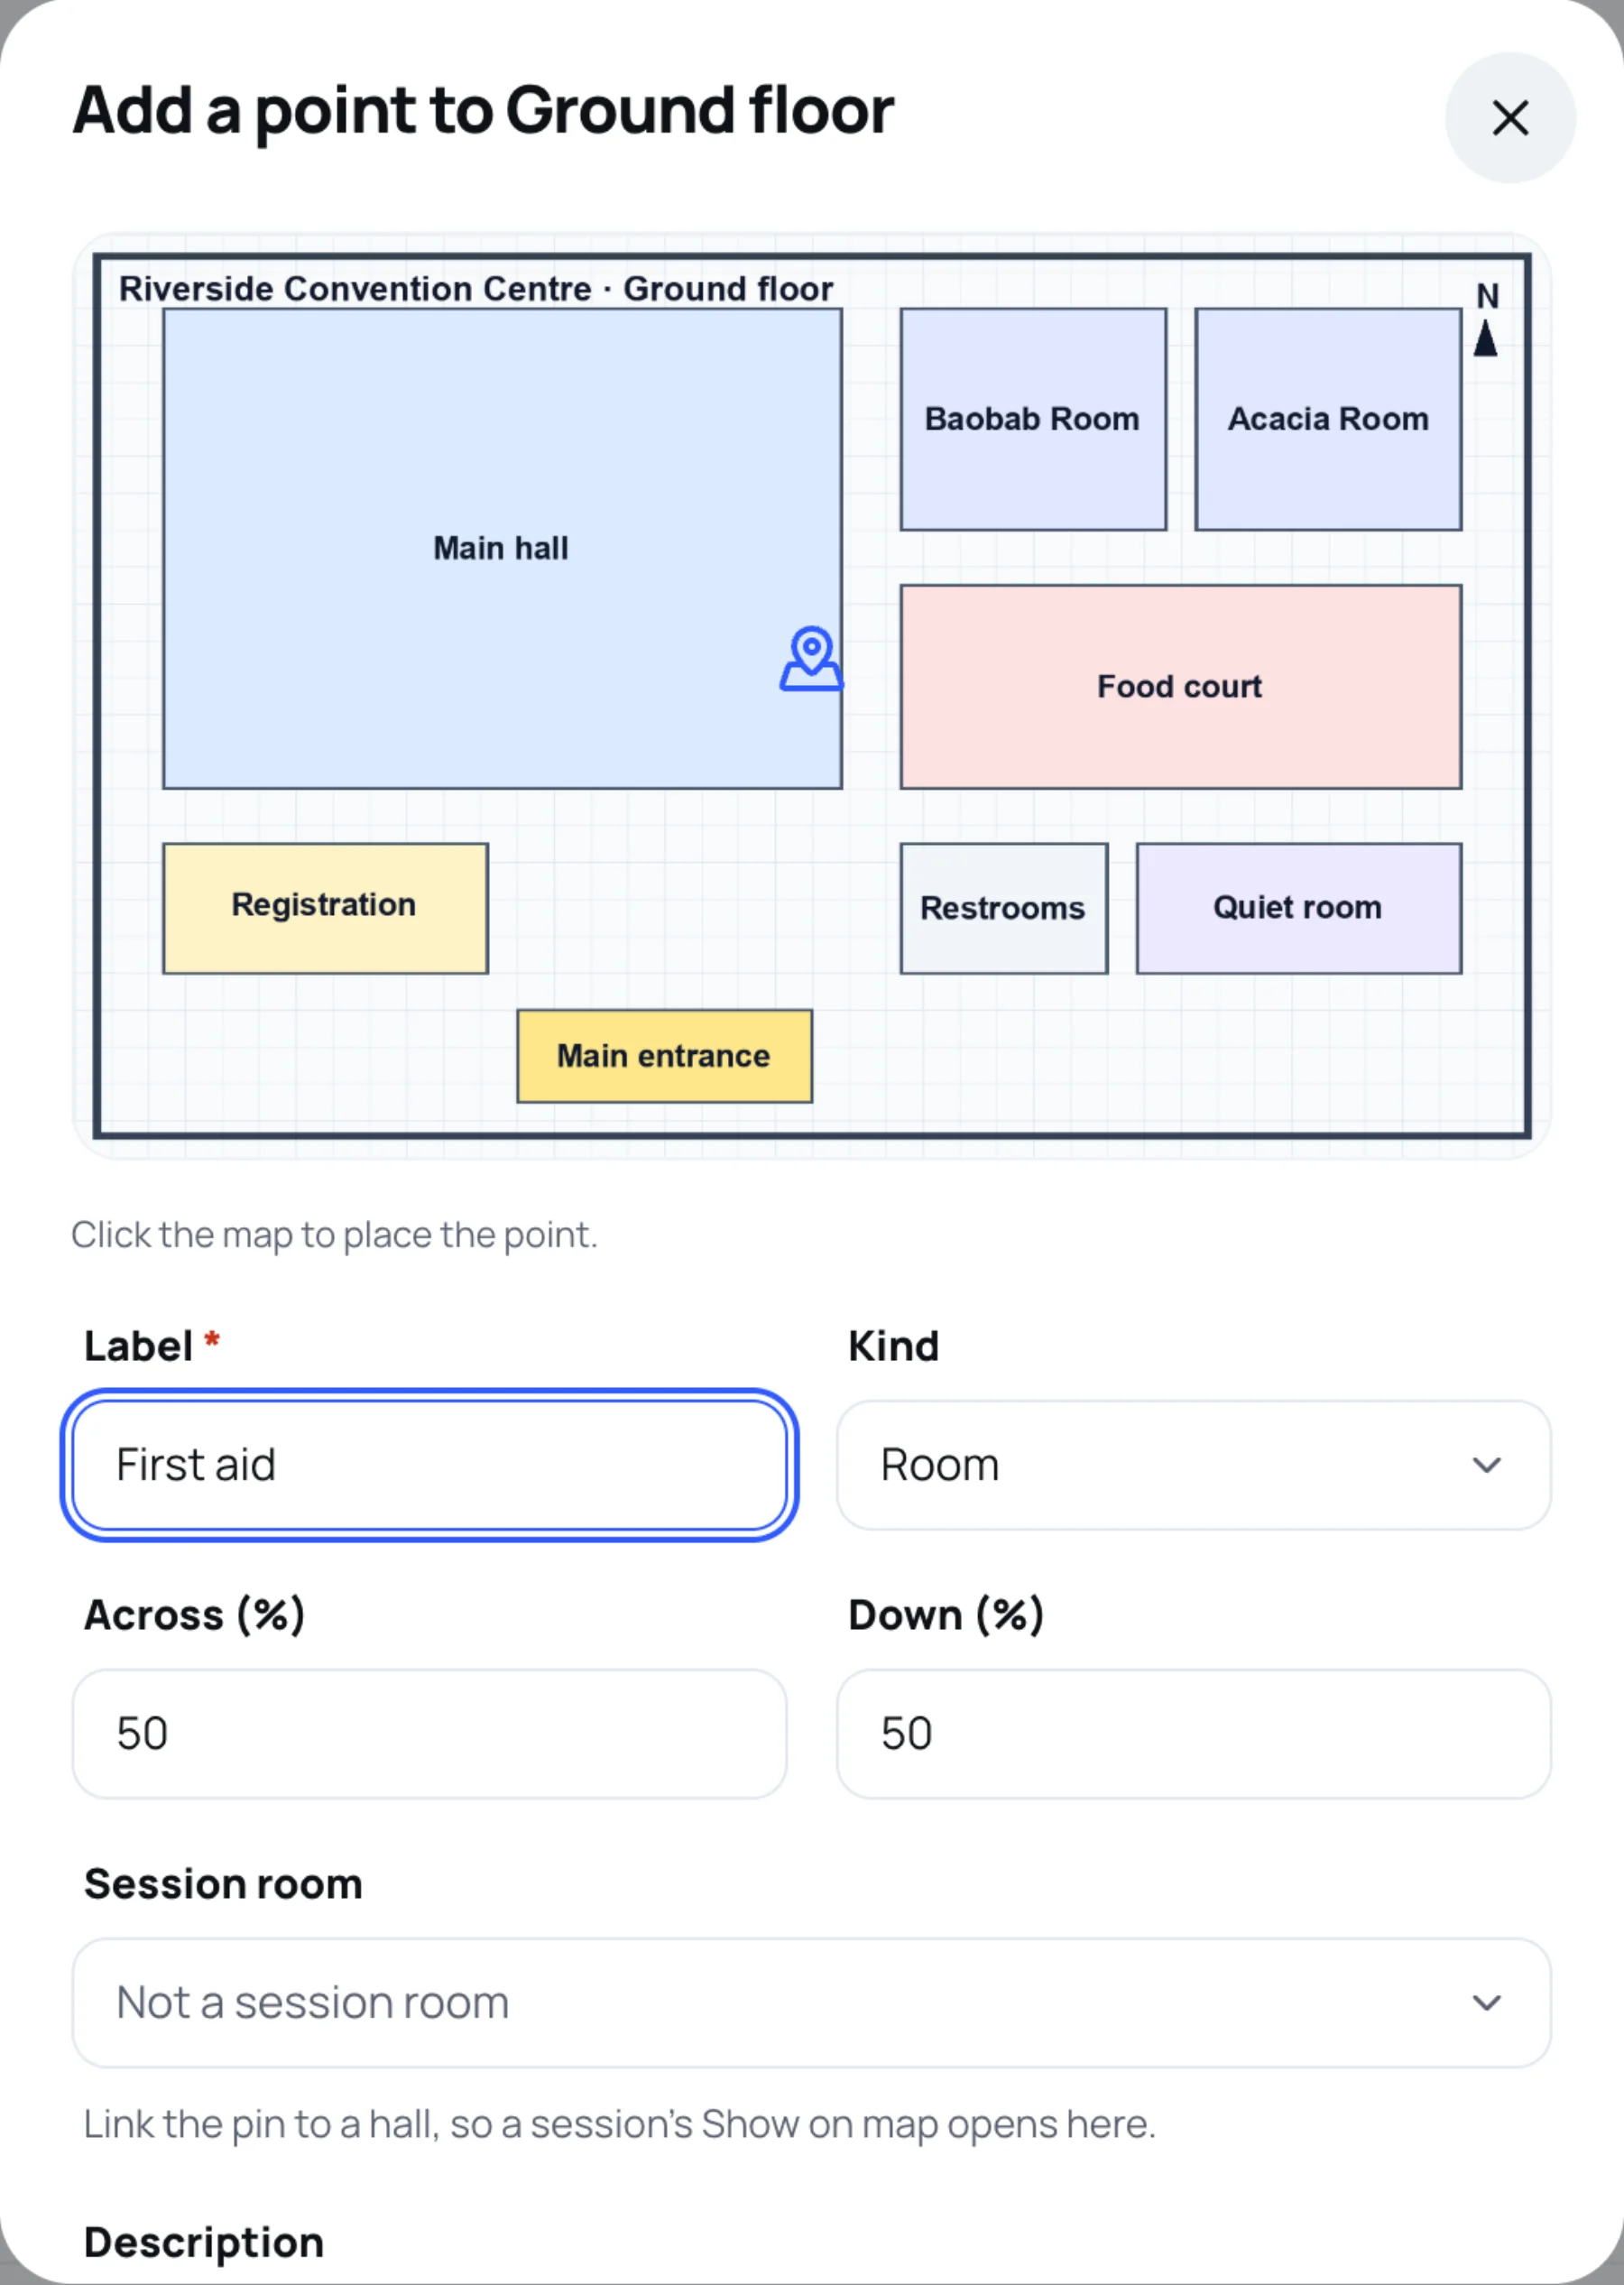
Click the map where the point belongs. You can also type its position as Across (%) and Down (%).
-
Type a Label and choose a Kind: Entrance, Stage, Room, Stand, Catering, Toilets, Registration, Accessibility, First aid or Step-free access.
-
If the point is a hall, choose it under Session room. A session's Show on map then opens here.
-
Add a Description if it helps, then select Save point.
Set up the halls
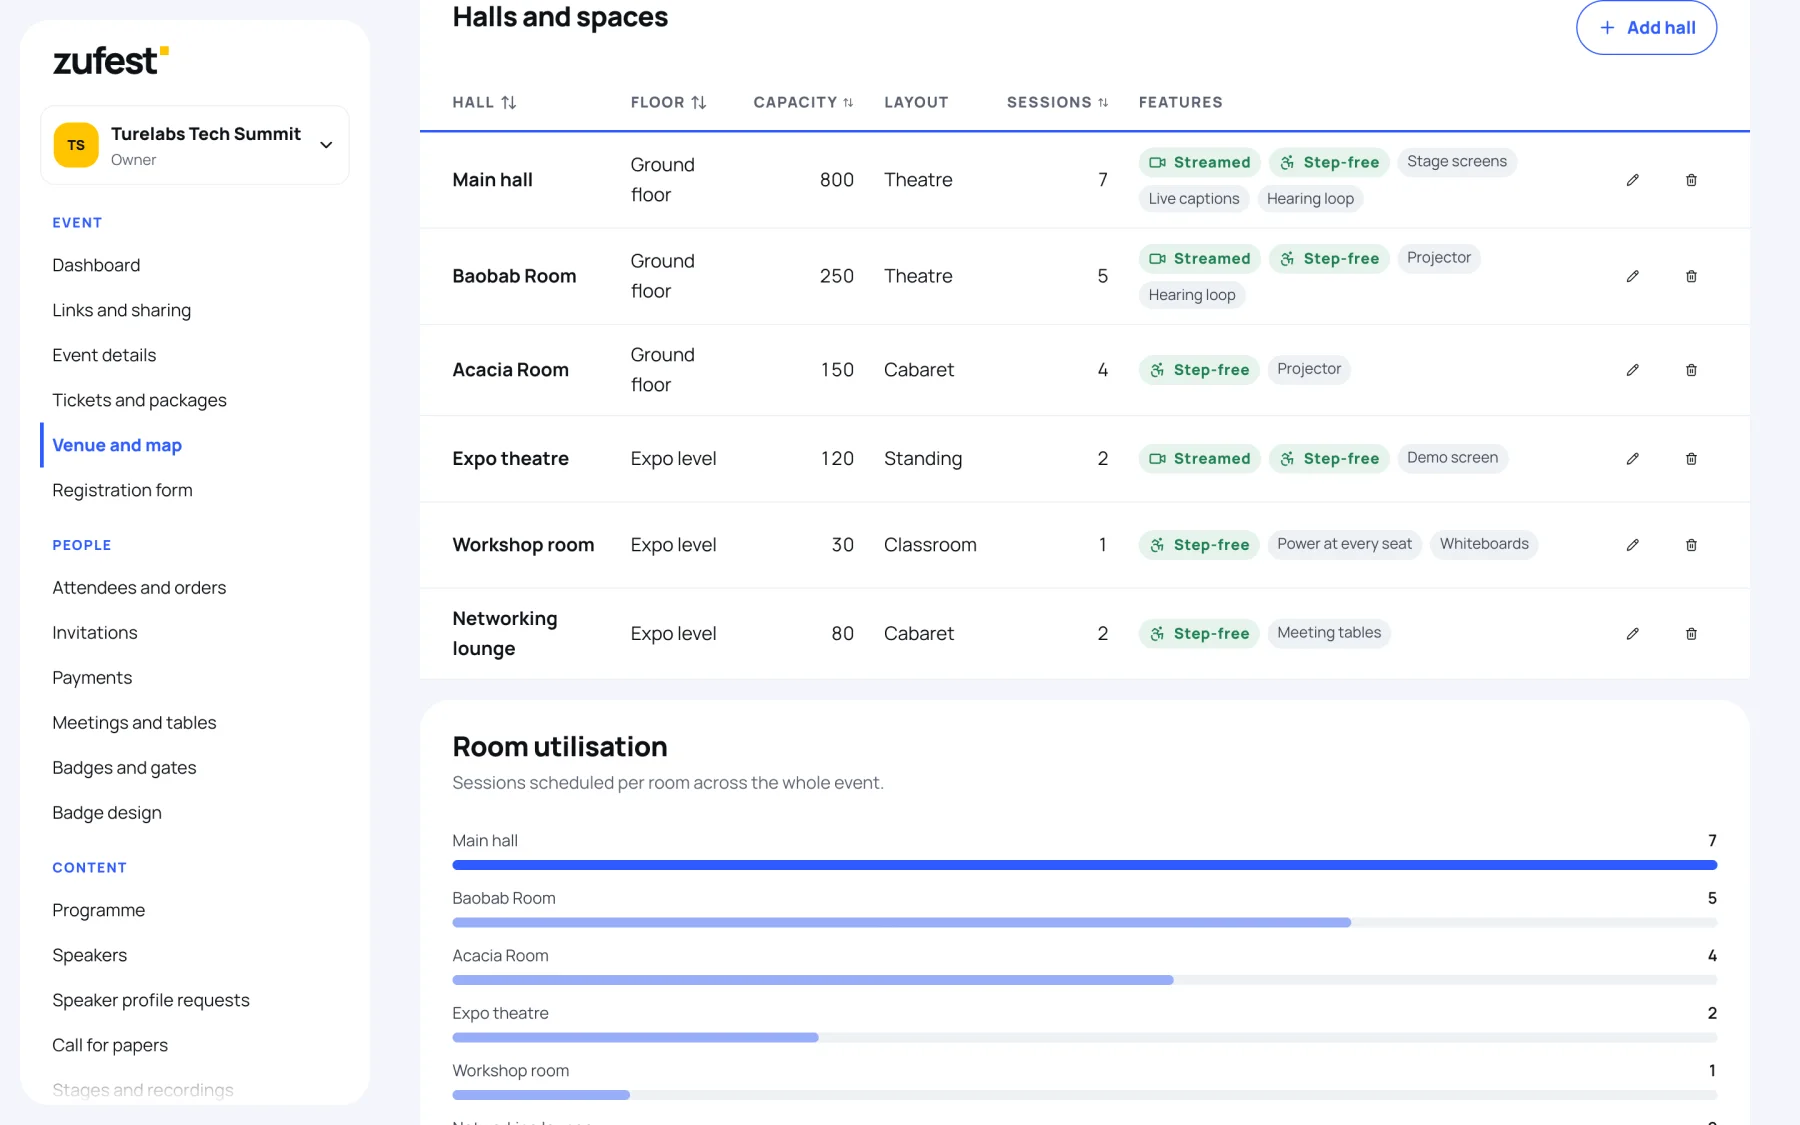
Halls are the rooms sessions take place in. Each one becomes a column in the programme builder.
-
Under Halls and spaces, select Add hall, or the pencil on a hall to edit it.
-
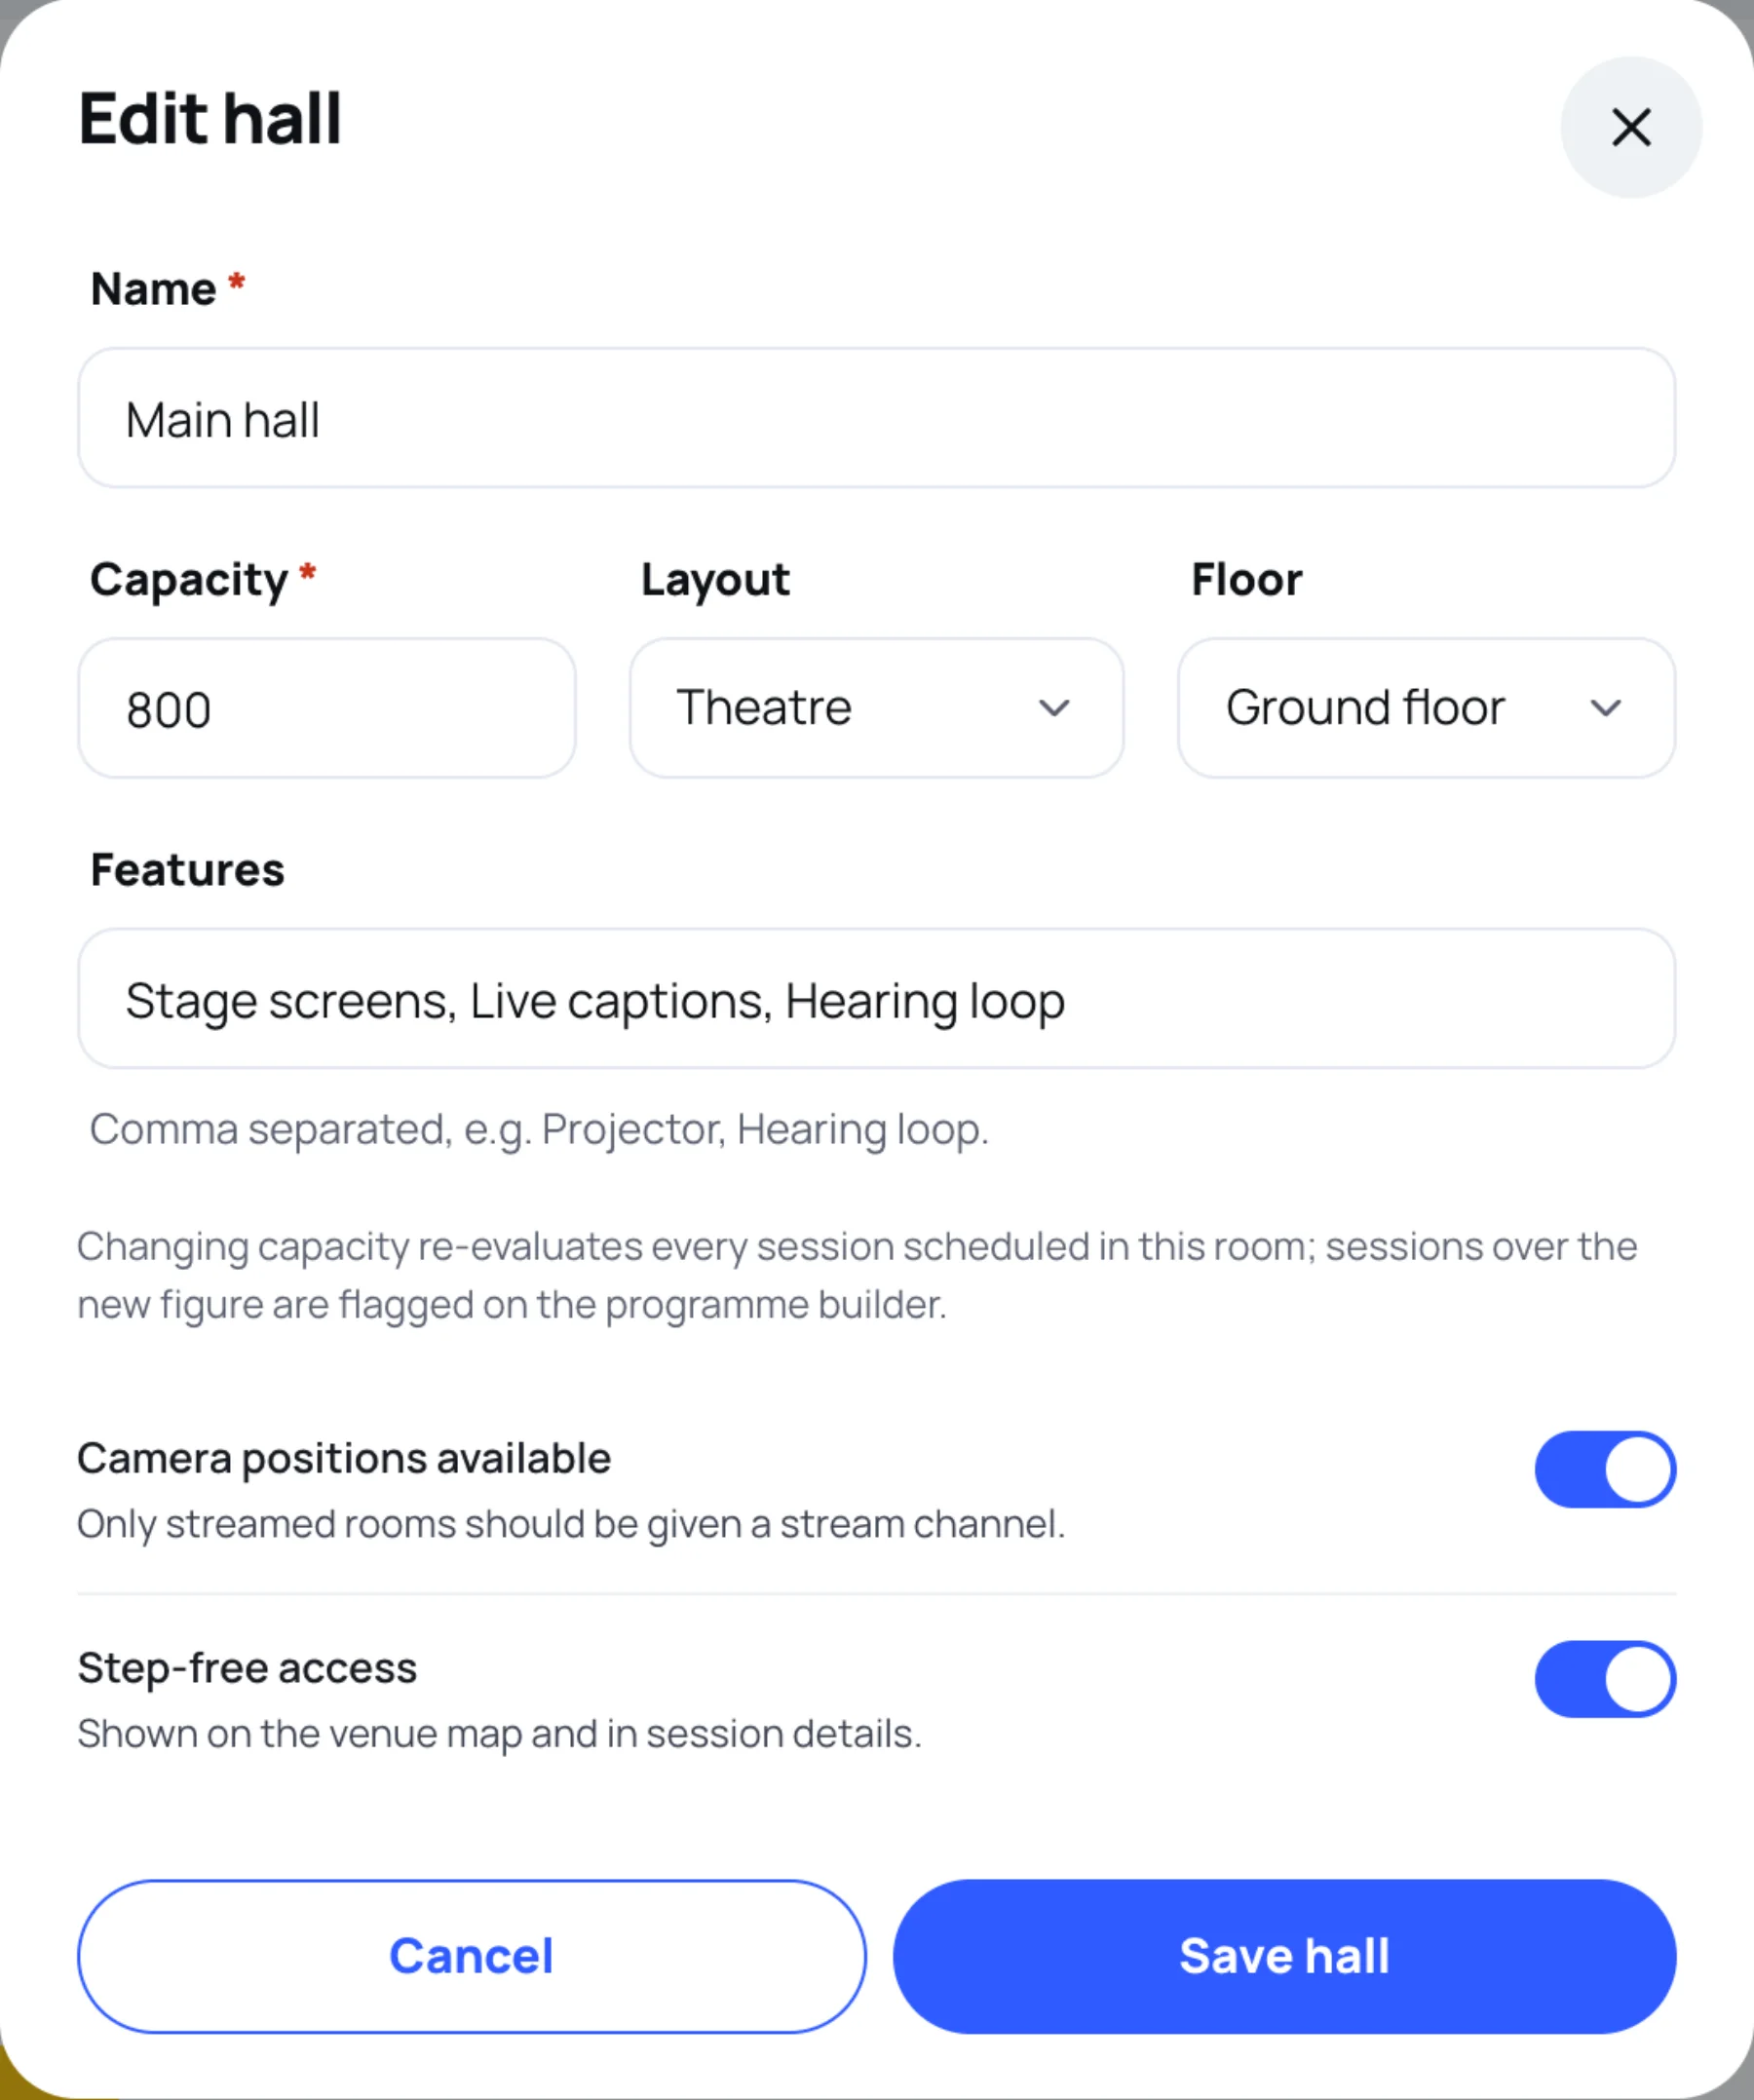
Give it a Name and a Capacity.
-
Choose a Layout (Theatre, Classroom, Cabaret or Standing) and the Floor it is on.
-
List its Features, separated by commas, for example
Projector, Hearing loop. -
Switch on Camera positions available for halls you will stream from, and Step-free access where it applies. Step-free access is shown on the venue map and in session details.
-
Select Save hall.
Room utilisation at the bottom shows how many sessions are scheduled in each hall across the whole event, so you can spot halls that are over or under used.
Last updated