Run a self check-in kiosk
A kiosk is a tablet or computer by the door where arrivals check themselves in. They scan the QR code on their ticket, or find their registration with their order reference and surname. If you choose, their badge prints as they arrive.
Set up the kiosk
-
On the tablet, sign in and open your event's organiser workspace.
-
In the sidebar, select Badges and gates, then Open the kiosk.
-
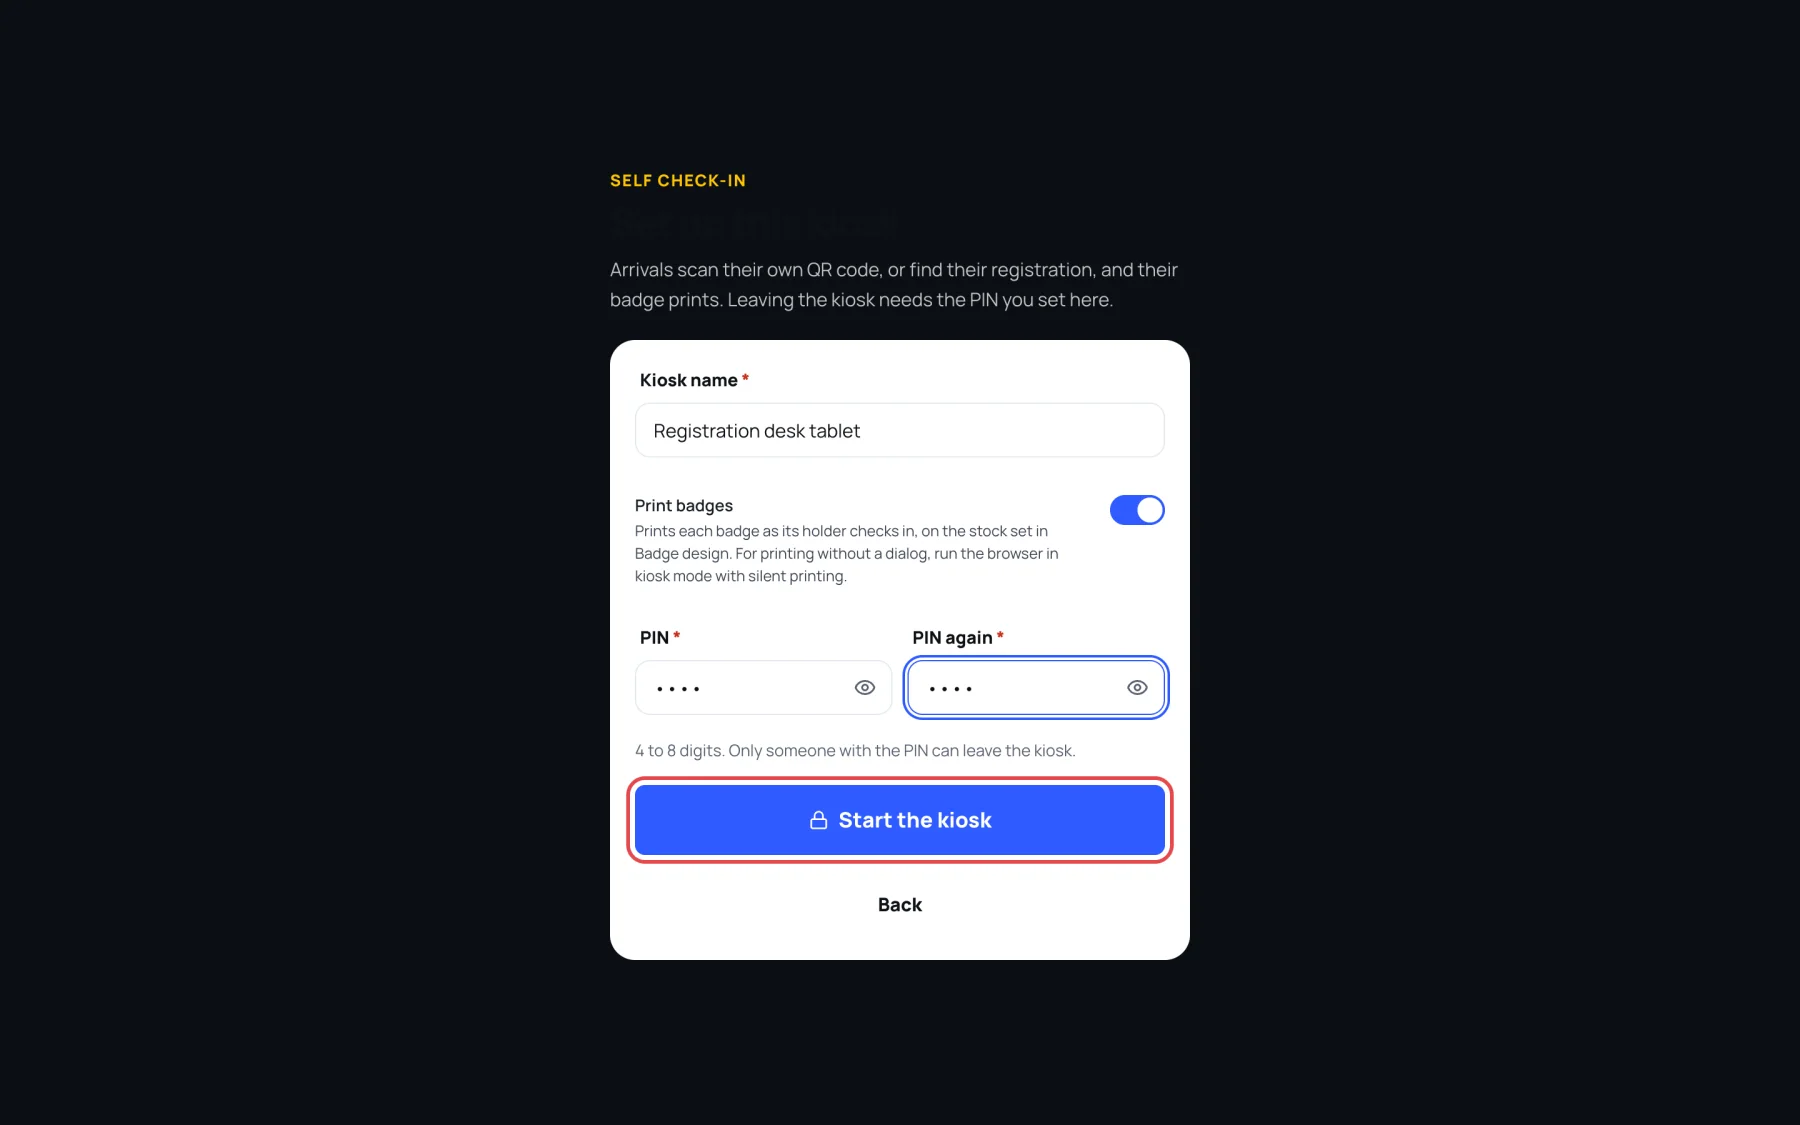
In Kiosk name, type a name, for example "Registration desk tablet". It appears as the gate in the scan feed.
-
Switch Print badges on to print each badge as its holder first checks in, or off if you hand out badges another way. On later days of the event the kiosk lets them in without printing again.
-
Type a PIN of 4 to 8 digits, then type it again in PIN again. Only someone with the PIN can leave the kiosk.
-
Select Start the kiosk. The page locks and asks to go full screen.
What arrivals see
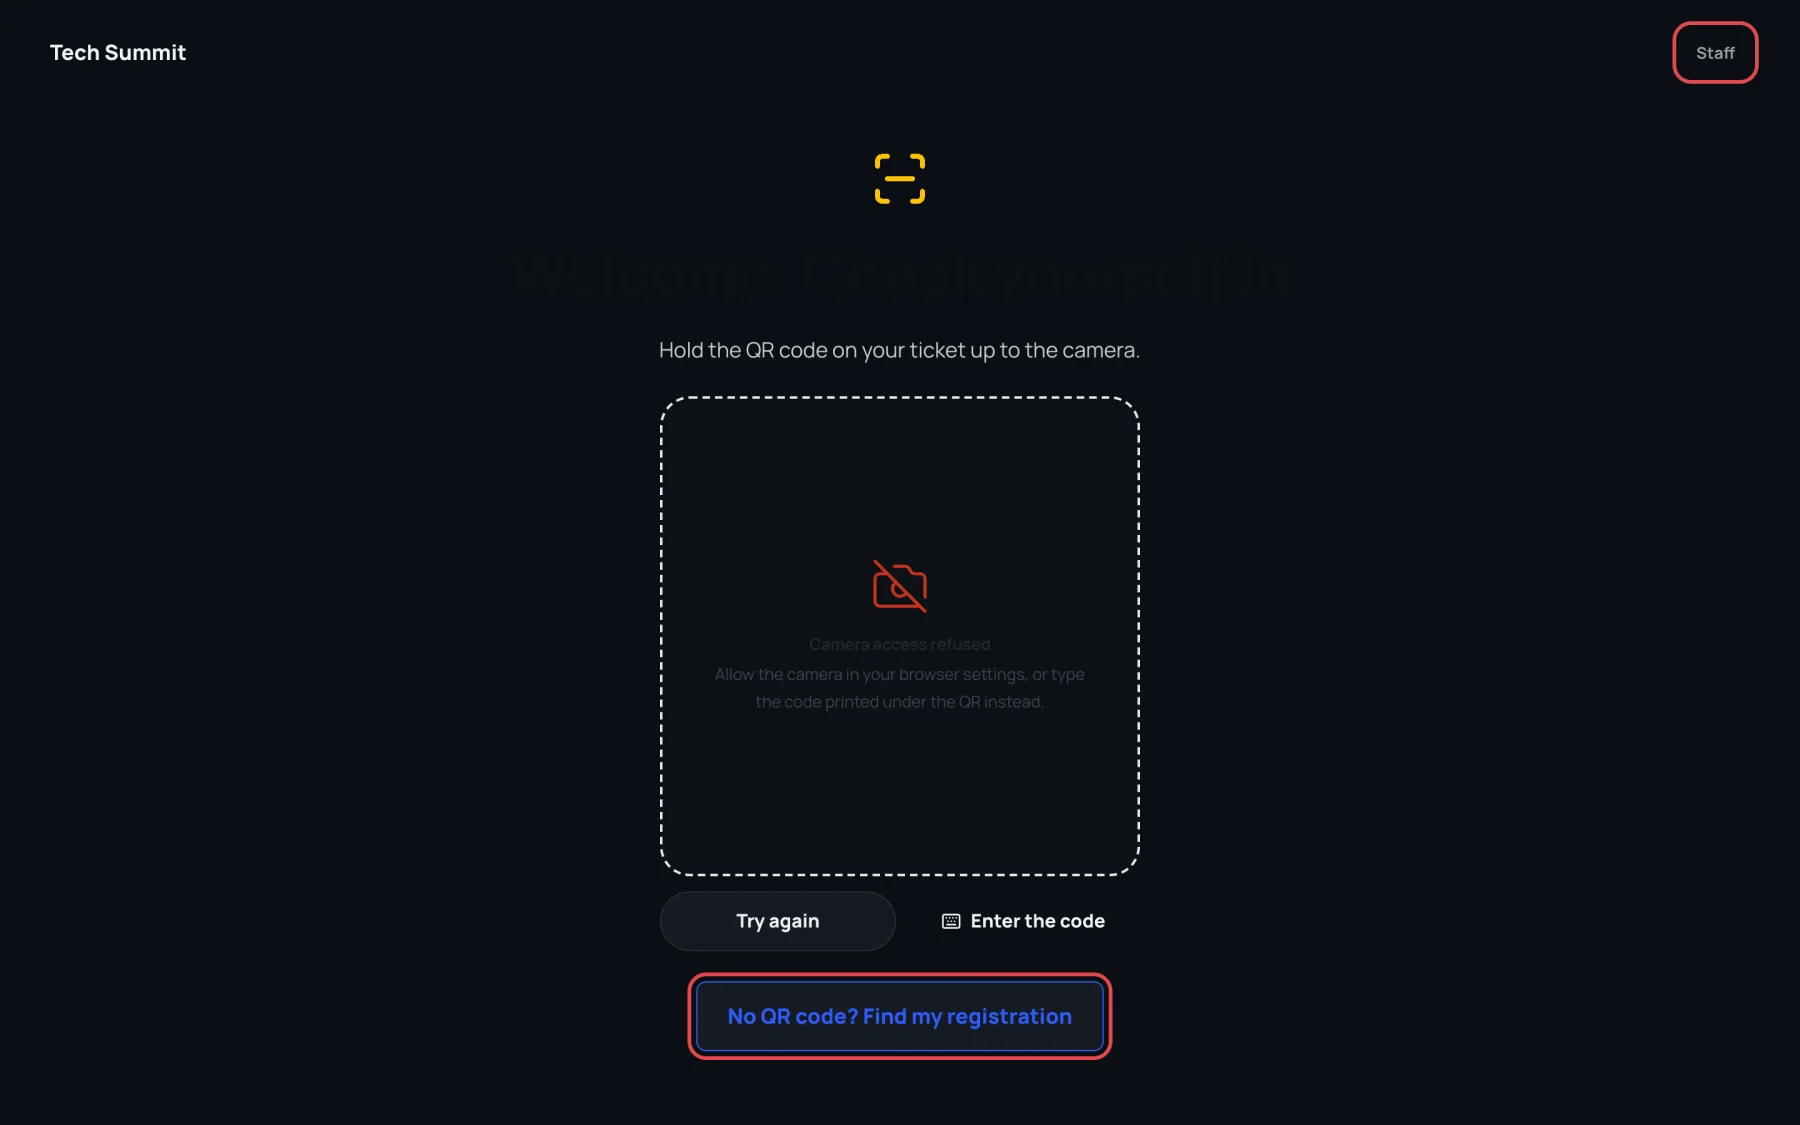
The kiosk shows Welcome. Check yourself in and opens the camera.
-
With a QR code: they hold their ticket up to the camera. If the camera cannot be used, Enter the code lets them type the code printed under the QR.
-
Without one: they select No QR code? Find my registration, type their Order reference (in their confirmation email, starting with ZF) and their Surname, then select Check me in. Capital letters, dashes and accents do not matter.
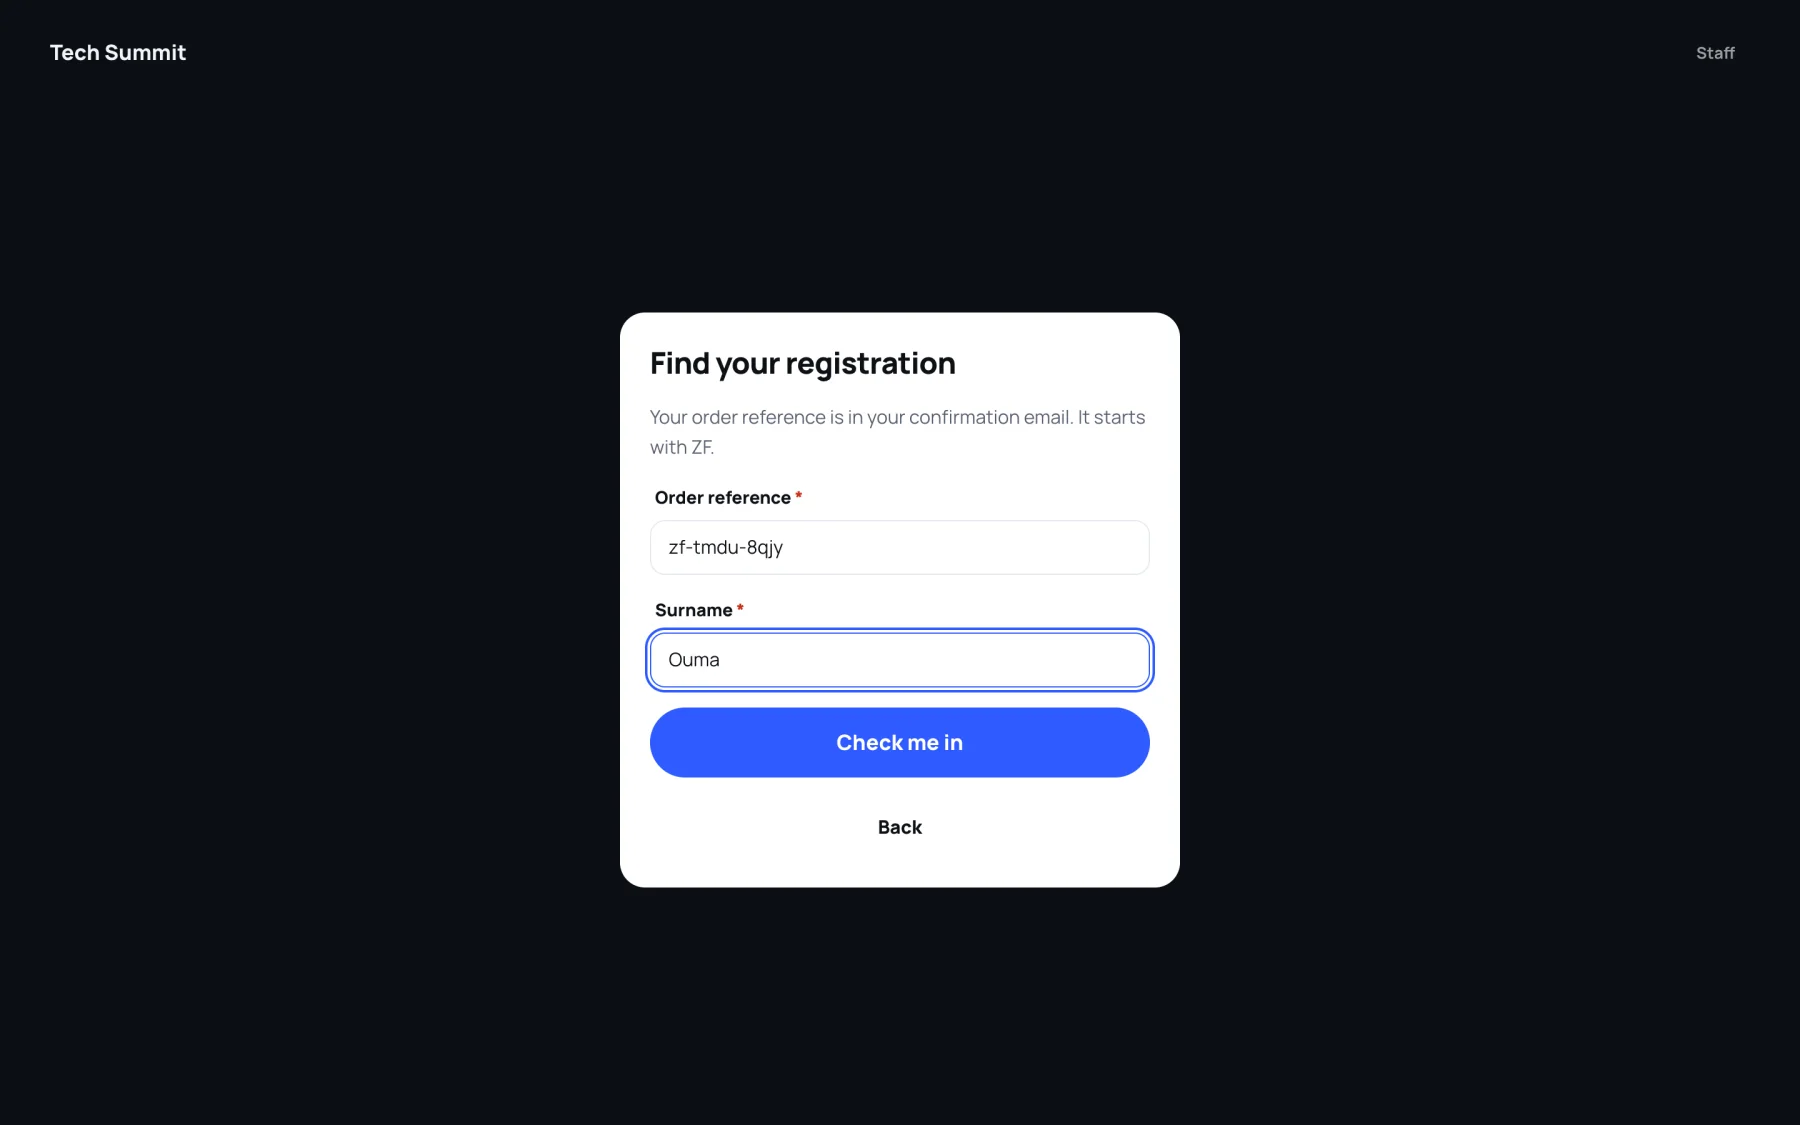
The screen then says "Welcome, Achieng!", "This badge was already used to check in today at 09:15", "This pass is for" a given day, or "We could not find you". It shows only the name, the ticket and the result: no email, money or order details. After a few seconds it is ready for the next person.
A kiosk check-in is the same as a scan at the gate: it is counted in the figures and logged in the scan feed.
Leave the kiosk
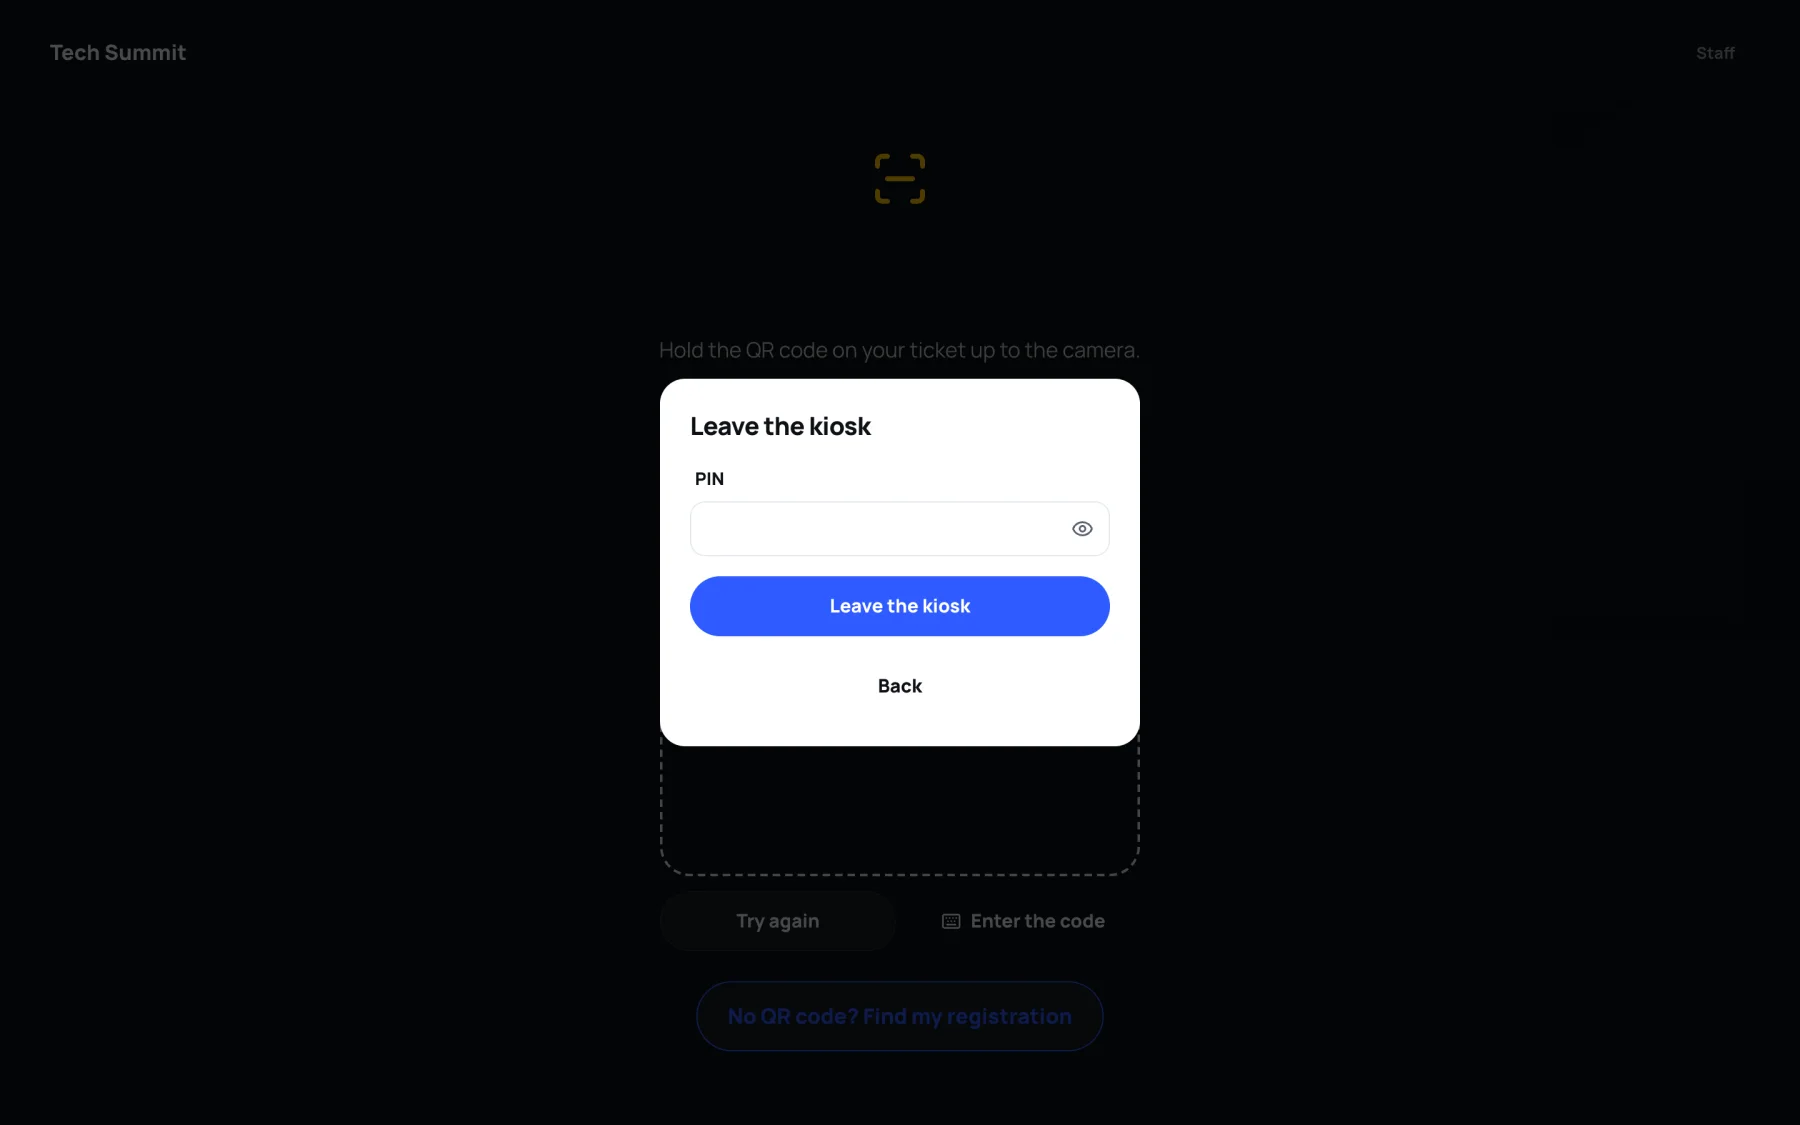
The kiosk stays on its page, even after the back button or a reload, until someone enters the PIN.
-
Select Staff in the top corner.
-
Type the PIN and select Leave the kiosk.
Last updated